Advanced Settings#
Authentication consists of a set of modules. Each module tries to authenticate the user. If it fails, the next one in the list is tried until the end of the list.
In this section you will find information about configuring the advanced authentication settings.
To configure the advanced authentication settings:
-
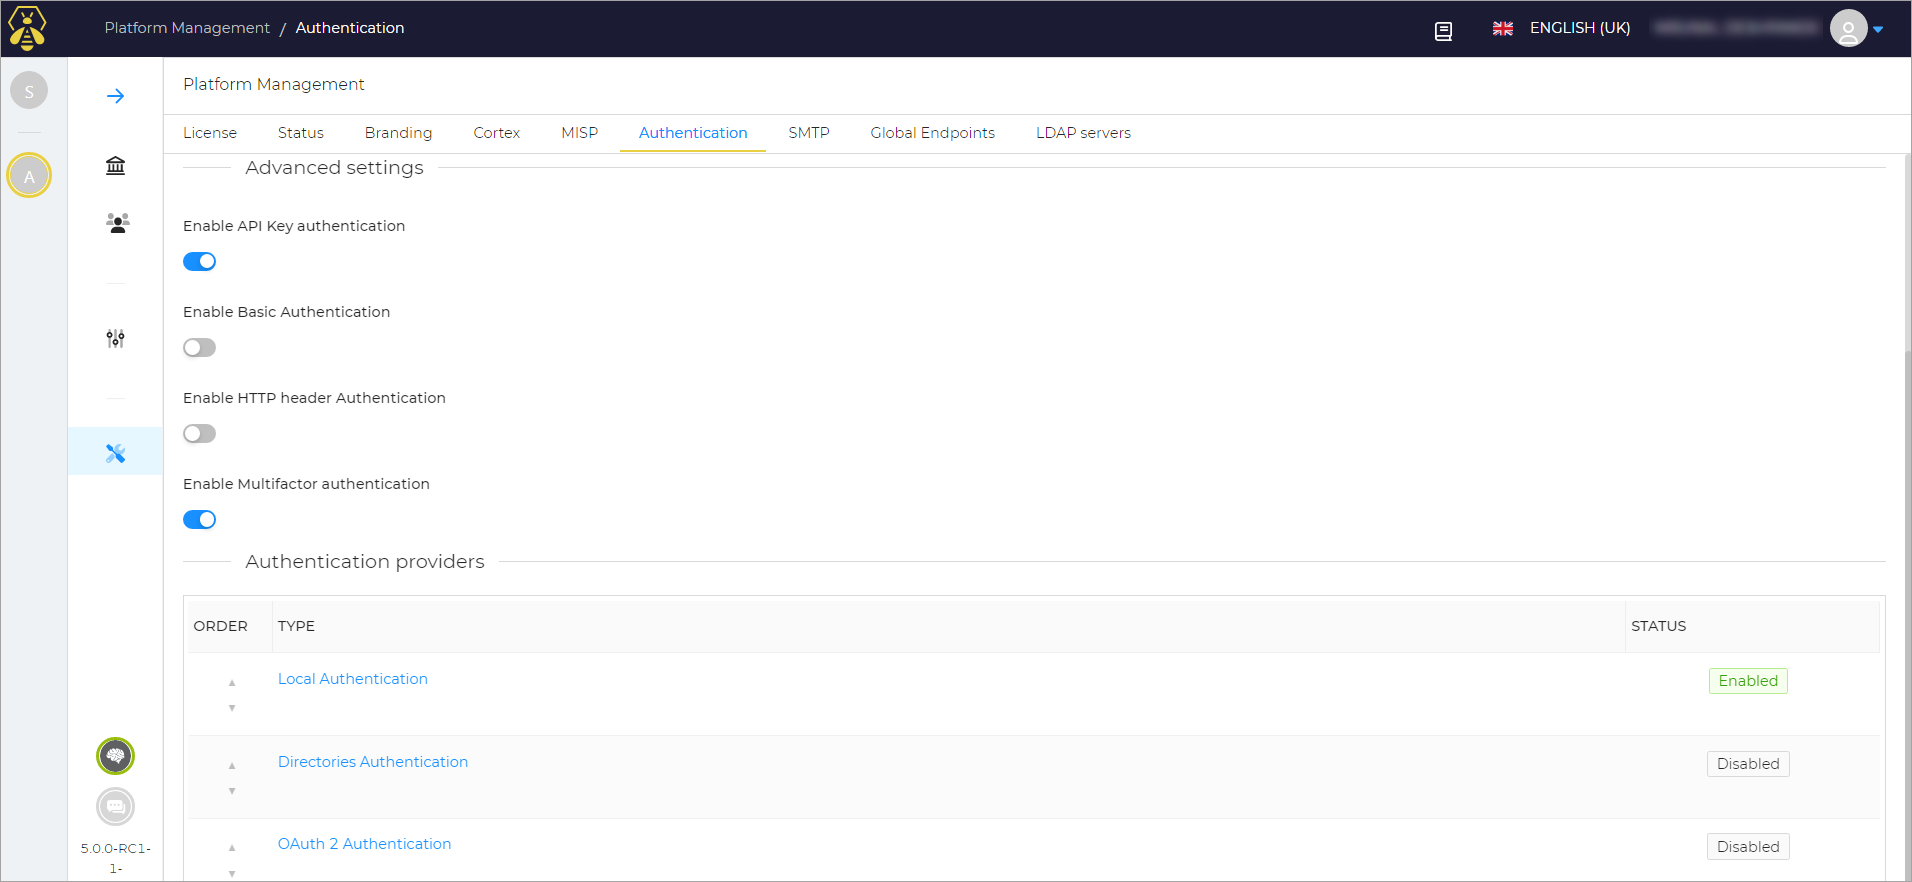
On the Platform Management page, in the Authentication tab, switch on the following buttons as per your requirement:
- Enable Basic Authentication: Authenticates HTTP requests using the login and password provided.
- Enable API Key authentication: Authenticates HTTP requests using an API key provided.
- Enable HTTP Header Authentication: Authenticates HTTP requests using a HTTP header containing the user login.
- Enable Multifactor authentication: Multi-Factor Authentication is enabled by default. This means users can configure their MFA through their User Settings page.
Manage Authentication Providers#
On the Platform Management page, in the Authentication tab, you can see the list of following Authentication providers.
-
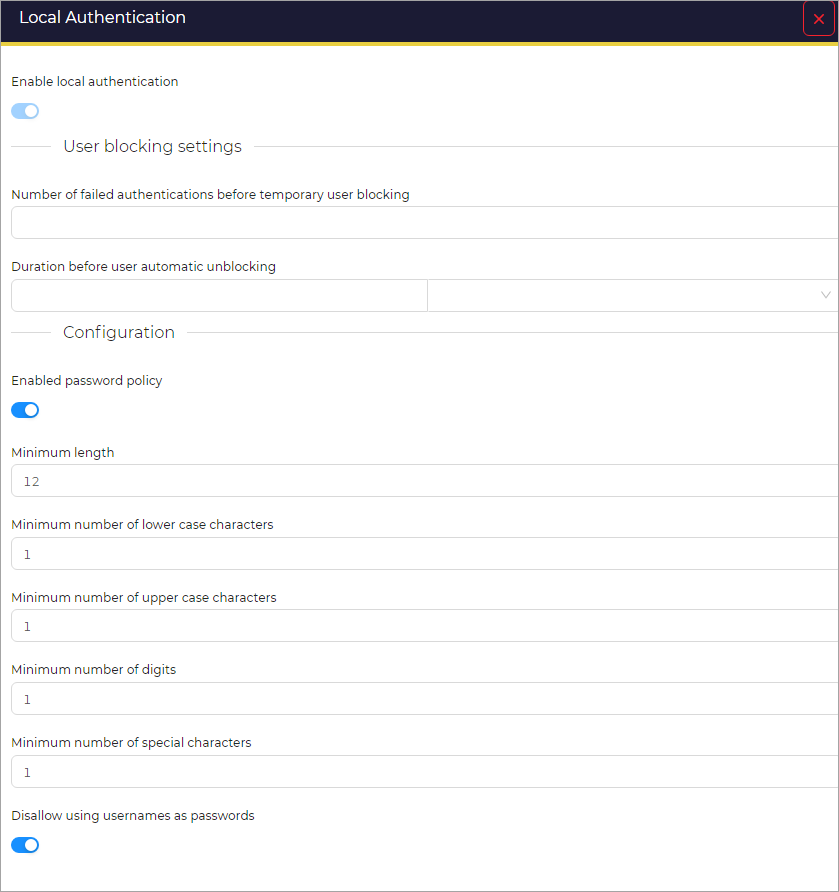
Local Authentication: You can manage a local user database where you can configure the password policy.
-
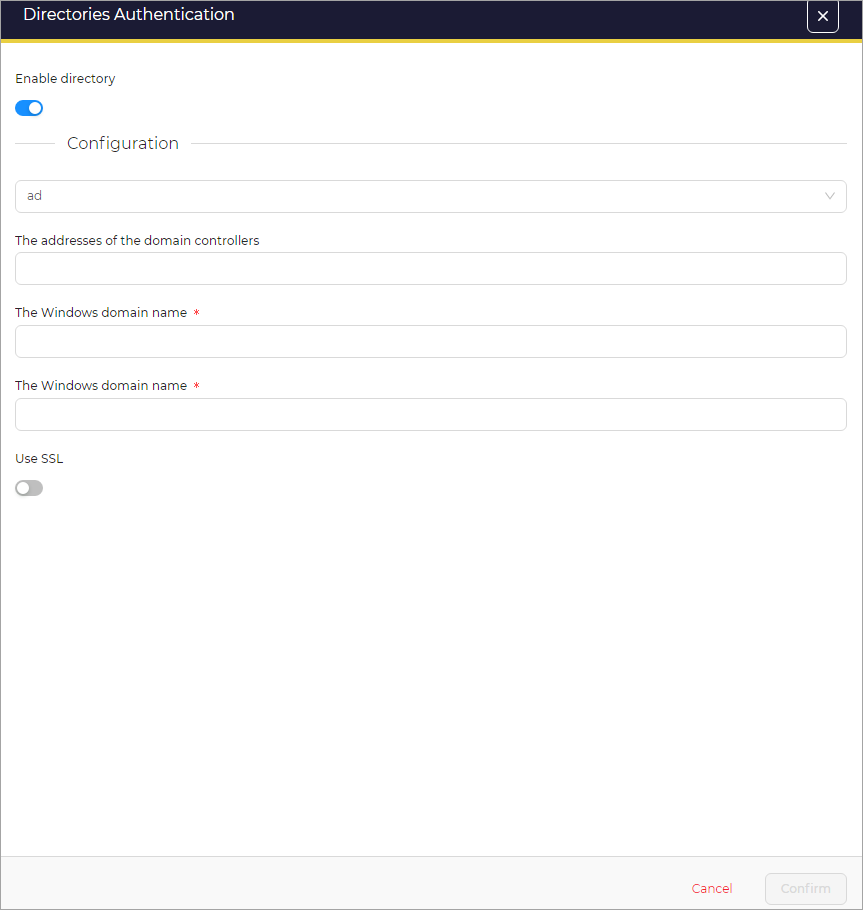
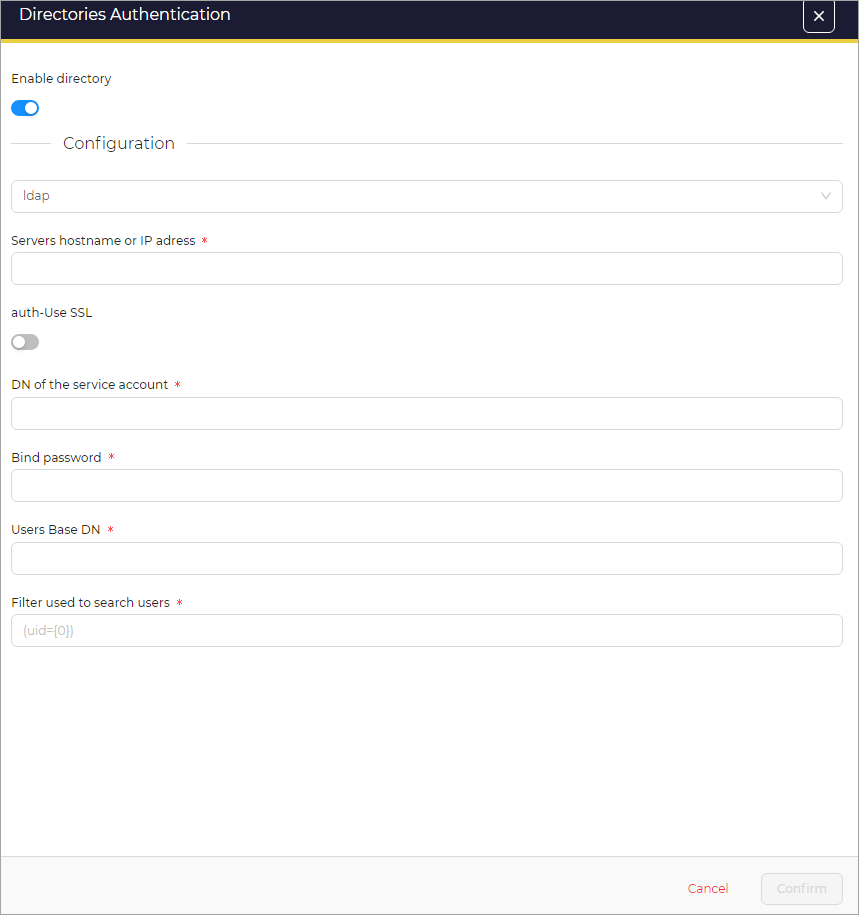
Directories Authentication: You can configure The Hive to use either active directory or LDAP to authorize the users. If you manage your users through a active directory, then you can configure TheHive in a way that every time a user enters the username, you will authenticate the crredentials in the configured active directory and if active directory accepts the credentials then you authorize the user.
Active Directory Configuration:
LDAP Configuration:
-
OAuth 2 Authentication: You can configure TheHive to sign in using single signon through external OAuth2 authenticator server.
