Create an Alert Feeder#
5.5 Platinum
Create an alert feeder in TheHive to automatically retrieve data at a defined frequency from an external service via an HTTP API call and convert it into alerts.
For an example configuration, see the Airtable example.
Procedure
-
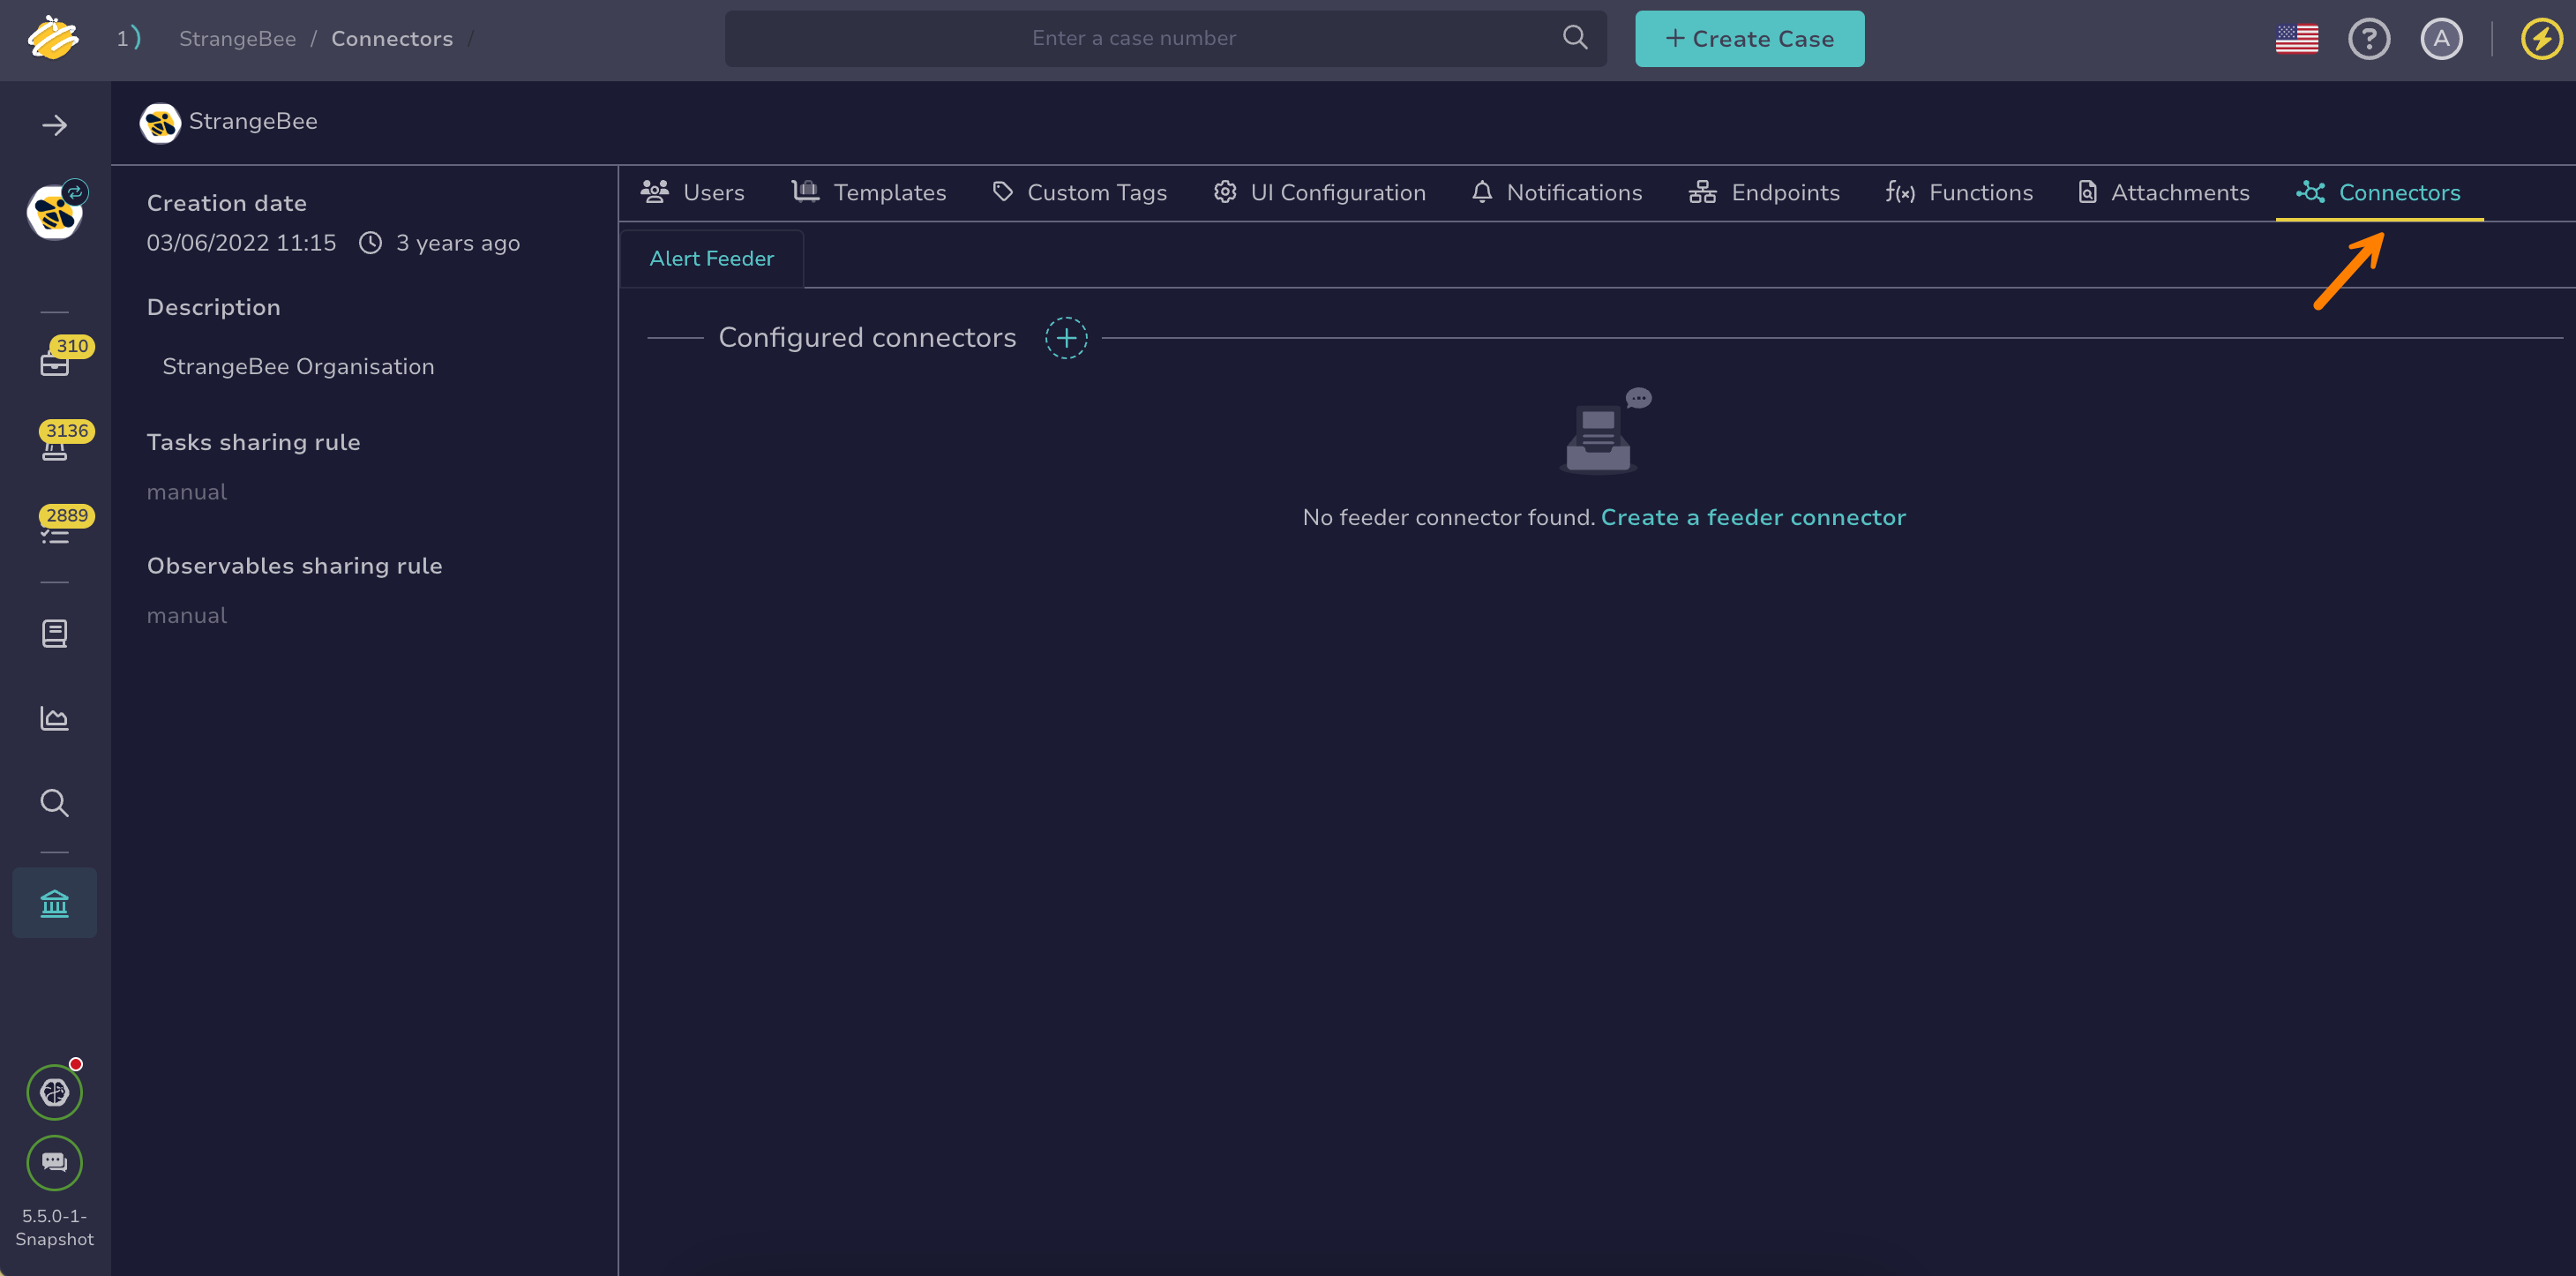
Go to the Organization view from the sidebar menu.
-
Select the Connectors tab.
-
Select .
-
In the General settings section, enter the following information:
- Name
A unique name for the alert feeder. You can’t change this name later.
- Interval
How often the alert feeder sends requests to the external system.
Define the interval carefully based on your reactivity requirements
Make sure the interval is shorter than the processing time to avoid potential issues, but not too short to prevent excessive requests to the API.
- Request timeout time
The maximum time, in seconds, the alert feeder waits for a response before timing out.
- Request response max size
The maximum response size, in megabytes, that the alert feeder accepts from the external system.
- Description
A description to provide additional context or notes about the alert feeder configuration.
-
In the HTTP request section, enter the following information:
- Method
The HTTP method to use when requesting data from the external system.
- URL
The endpoint URL of the external system.
-
Select in the Headers section to add headers.
Enter a header key and its corresponding value to include in the HTTP request. Use headers to send authentication tokens, content types, or other metadata required by the external system.
-
In the Authentication section, select an authentication type if required.
-
In the Proxy settings section, select the proxy settings you want to apply:
- Default configuration
- Disabled
- Enabled:
- Enter the type of protocol, either HTTP or HTTPS.
- Enter the IP address or domain name of the proxy server.
- Enter the port number used by the proxy server.
- Turn on the Authentication toggle if you want to require a username and password to authenticate with the proxy server.
-
Add a certificate authority (CA).
The server's SSL/TLS certificate must be trusted by the Java virtual machine (JVM) truststore for secure connections. If your server uses a certificate from an internal CA or self-signed certificate, add it to the JVM truststore first. See Configure JVM Trust for SSL/TLS Certificates for instructions.
You can turn off the Don't check certificate authority toggle to bypass certificate validation, but this isn't recommended as it may compromise connection security.
-
Turn on the Disable host name verification toggle if you want to bypass the verification of the server's host name against the certificate.
-
Select Test connection to verify the connection to the external system.
-
Create a function to map fields from the external system to TheHive format:
Feeder function
Once created, the function is automatically added to the functions list with the type feeder.
- Function name
Enter a name for the function. You can’t change this name later.
- Description
Describe what the function does.
- Definition
Enter the JavaScript code for your function. If you need inspiration, check out the GitHub repository with function examples.
Basic function structure
In TheHive, a function follows this basic structure:
function handle(input, context) { // Your function logic goes here }- The
handlefunction: This is where you write your script. Your function must be placed inside this structure. - The
inputparameter: This represents the data passed into the function. Its content depends on how the function is triggered. - The
contextparameter: This provides access to TheHive’s environment, allowing your function to interact with common TheHive actions.
Duplicate management
Make sure to implement duplicate management in your functions to prevent duplicate objects.
- The
-
In the Test function section, you can test your function as follows:
* Enter input data by selecting *input*.

* Select one of the following:

    * **Run function (dry-run)** to simulate the function without sending data.
    * **Run function** to execute the function with actual data.

* After running the function, select one of the following to view results:

    * *result* to view the function’s output
    * *stdout* to display standard output from the function
    * *stderr* to display errors and warnings
-
Select Confirm.
Airtable example#
Airtable is one of the external systems you can configure as an alert feeder in TheHive. Airtable is a cloud-based platform that combines the features of a spreadsheet and a database.
Query#
--location --request GET 'https://api.airtable.com/v0/<base_id>/<table_id>?returnFieldsByFieldId=false&cellFormat=string&timeZone=<timezone>&userLocale=<locale>' \
--header 'Content-Type: application/json' \
--header 'Authorization: Bearer <api_key>' \
--data '{
    "returnFieldsByFieldId": true,
    "maxRecords": 1
}'
Response#
{
    "records": [
        {
            "id": "rec3mzMkF2JNsApxn",
            "createdTime": "2025-01-23T16:18:13.000Z",
            "fields": {
                "Incident Category": "Security",
                "Issue Description": "Phishing campaign on financial department"
            }
        },
        {
            "id": "rec5FB3iOuoT9avrm",
            "createdTime": "2025-01-23T17:50:56.000Z",
            "fields": {
                "Incident Category": "Software",
                "Reported By": "U003",
                "Priority Level": "ASAP",
                "Assigned Agent": "SOC Officer",
                "Department": "Supply chain",
                "Issue Description": "Supply chain server SPC-345 infected",
                "Resolution Details": "RES-003"
            }
        },
        {
            "id": "rec6FGdVFzMQX3Ke4",
            "createdTime": "2025-01-21T14:00:49.000Z",
            "fields": {
                "Incident Category": "Security",
                "Reported By": "Automated alert",
                "Priority Level": "ASAP",
                "Issue Description": "Software version need to be updated"
            }
        },
        ...
    ]
}
Feeder function#
You can find the function example for creating an alert from Airtable in the GitHub repository.