Build Your First Workflow#
6.0 One
Ready to see TheHive Flow in action? In this exercise, you'll build a complete workflow from scratch and learn why each piece works the way it does.
By the end, you'll have a working workflow that automatically converts CVEs from CIRCL for a specific vendor and product into alerts in TheHive. Along the way, you'll get hands-on with the core concepts you'll reuse in every workflow you build:
- Connecting nodes to pass data from one action to the next
- Fetching data from an external API using HTTP requests
- Using variables to store and transform data throughout a workflow
- Building loops to process multiple items automatically
- Using conditions to filter and validate data
- Creating alerts in TheHive from external data sources
You don't need any prior knowledge or access to external tools. You'll use publicly available CVE data throughout.
This exercise takes approximately 30 minutes to complete.
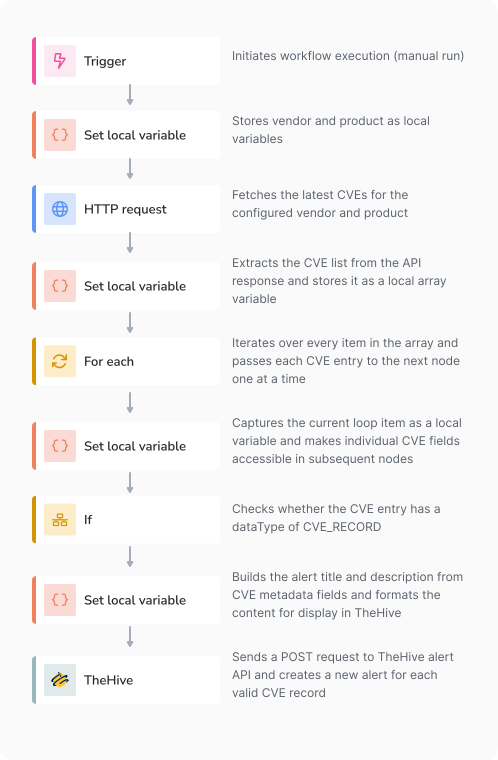
Step 1: Create a workflow#
Start by setting up a new workflow in TheHive Flow.
-
Go to the Flow view from the sidebar menu.
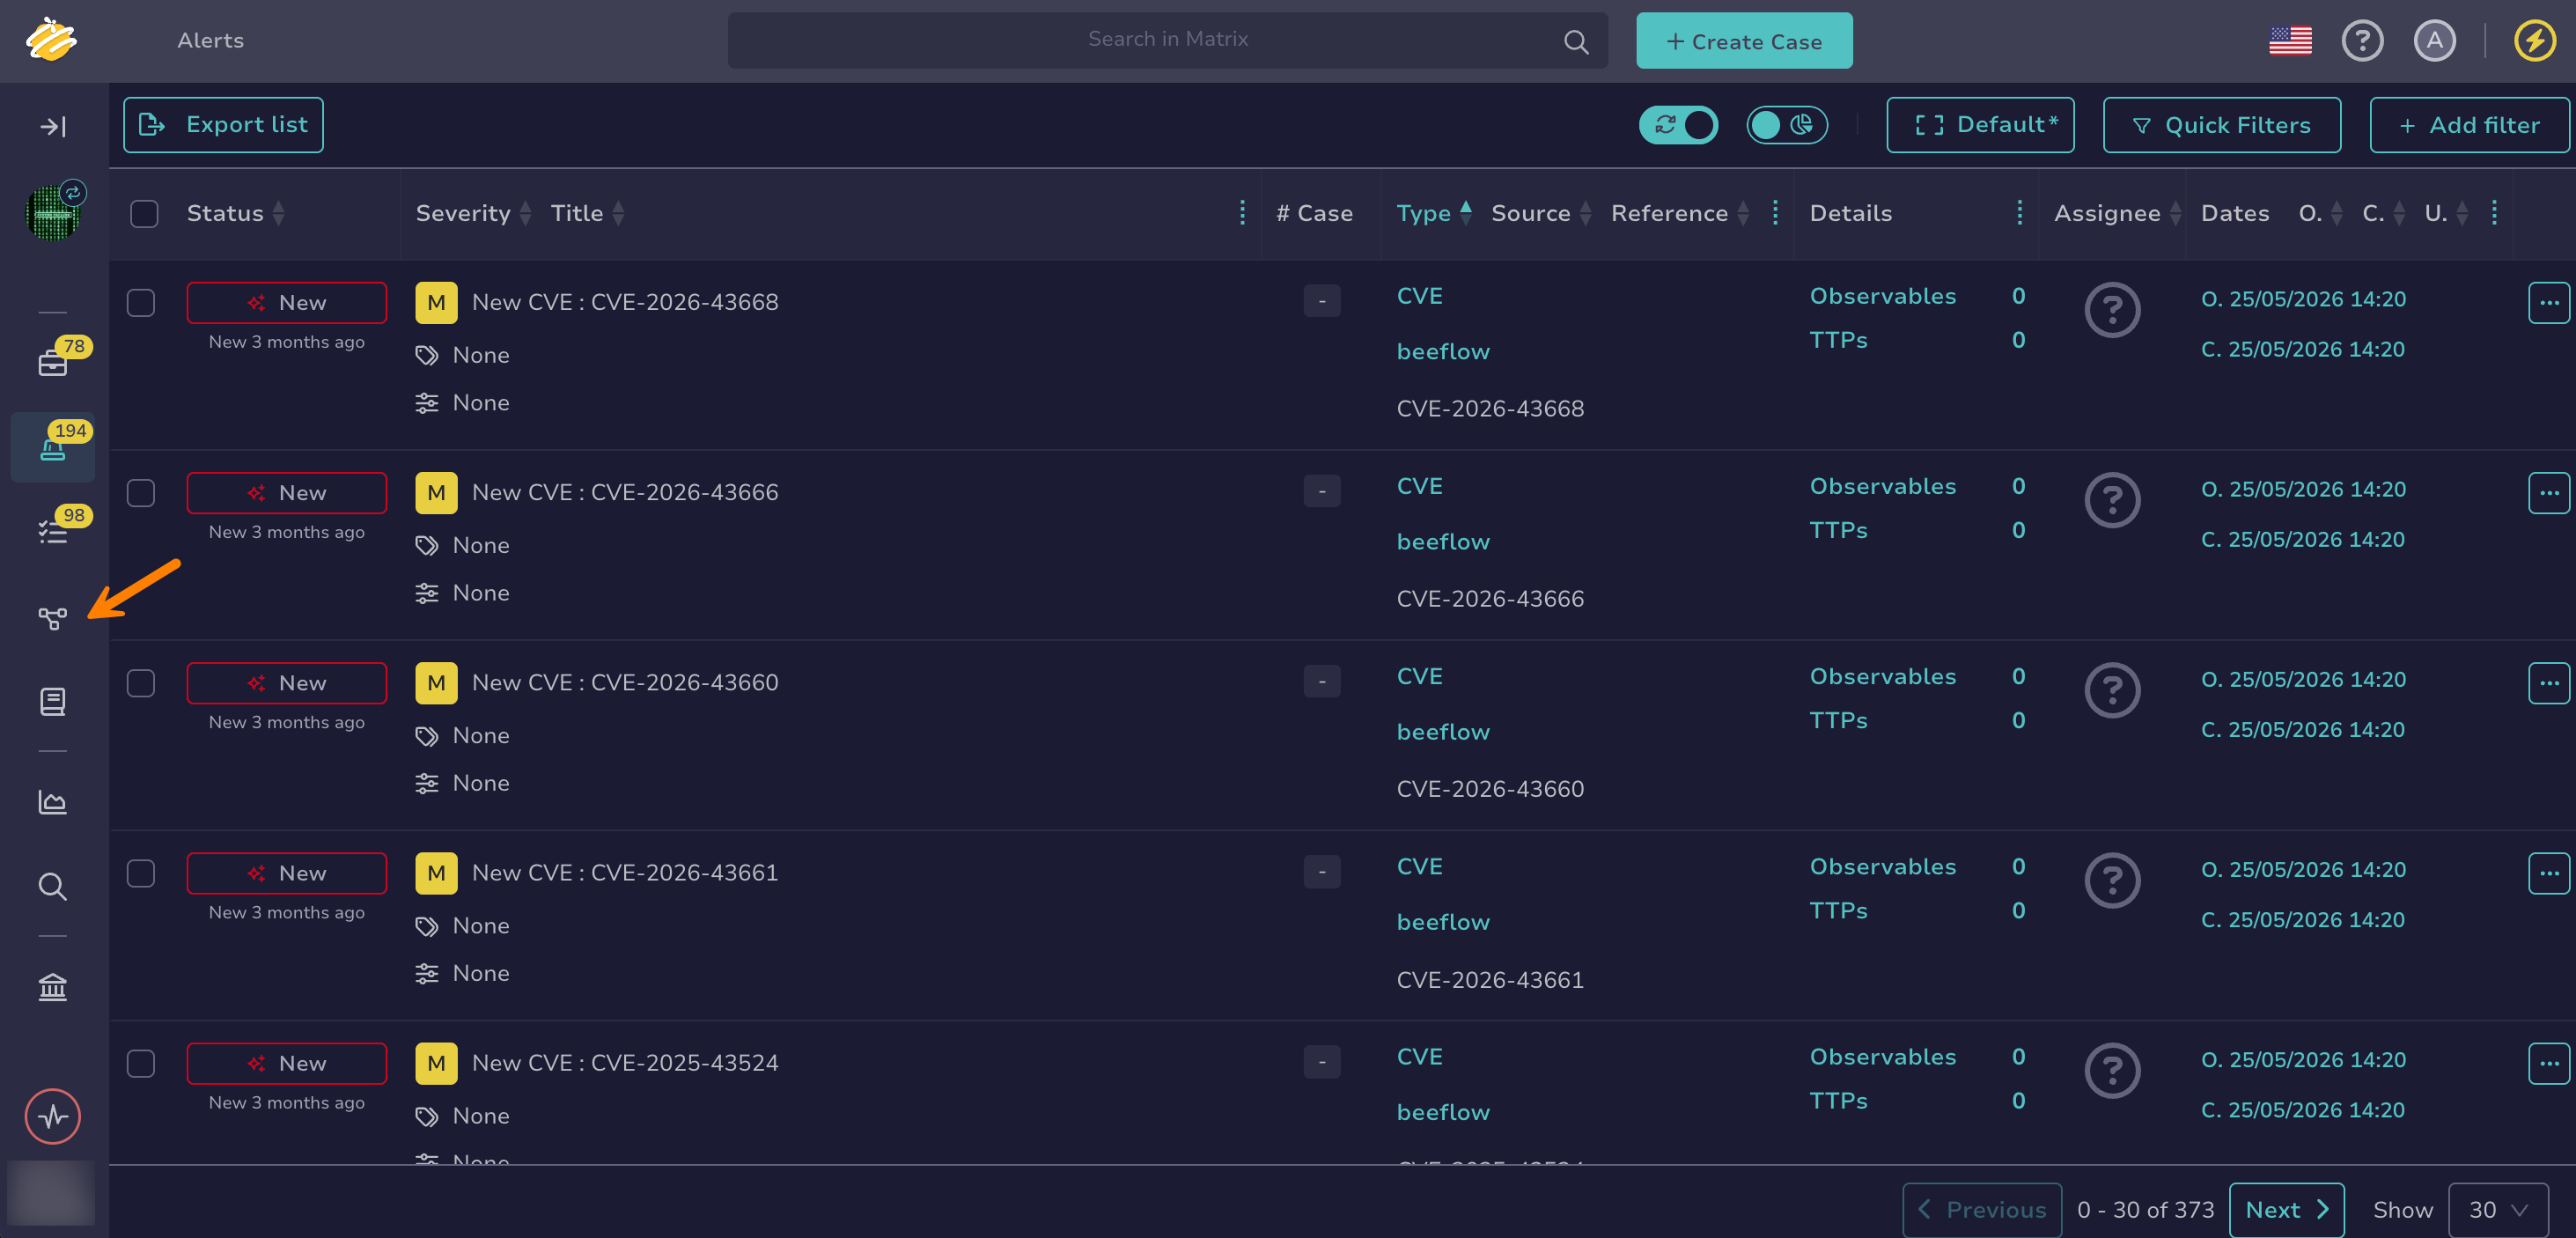
-
Select .
-
In the Workflow information drawer, enter the following information:
- Name:
Turn CIRCL CVEs into alerts- Description:
Automatically fetch the latest CVEs from CIRCL and create security alerts in TheHive- Tags:
cve- Timeout:
15 minutesThe timeout defines the maximum allowed execution time for the entire workflow. You can also set a timeout at the node level. When both are defined, the shortest value applies.
-
Select Save.
You'll arrive directly in the workflow editor. You can see that TheHive has created your workflow in a Disabled state with a default trigger node. The trigger node is the entry point that initiates workflow execution. Two triggers are available: Webhook, which starts the workflow when its URL receives an HTTP request, and Scheduler, which starts it on a recurring schedule. You can also run a workflow manually, from the workflow editor or from a case or alert page in TheHive, regardless of its trigger configuration.
For this exercise, skip the trigger configuration. You'll run the workflow manually later.
Step 2: Set the vendor and product#
You'll fetch CVEs for Apple macOS. Rather than hardcoding these values in the CIRCL API request, store them as local variables. They're scoped to a single workflow run and available to all subsequent nodes.
-
In the workflow editor, drag the trigger node connector to an empty area of the canvas.
The layout is free, so you can place nodes anywhere on the canvas.
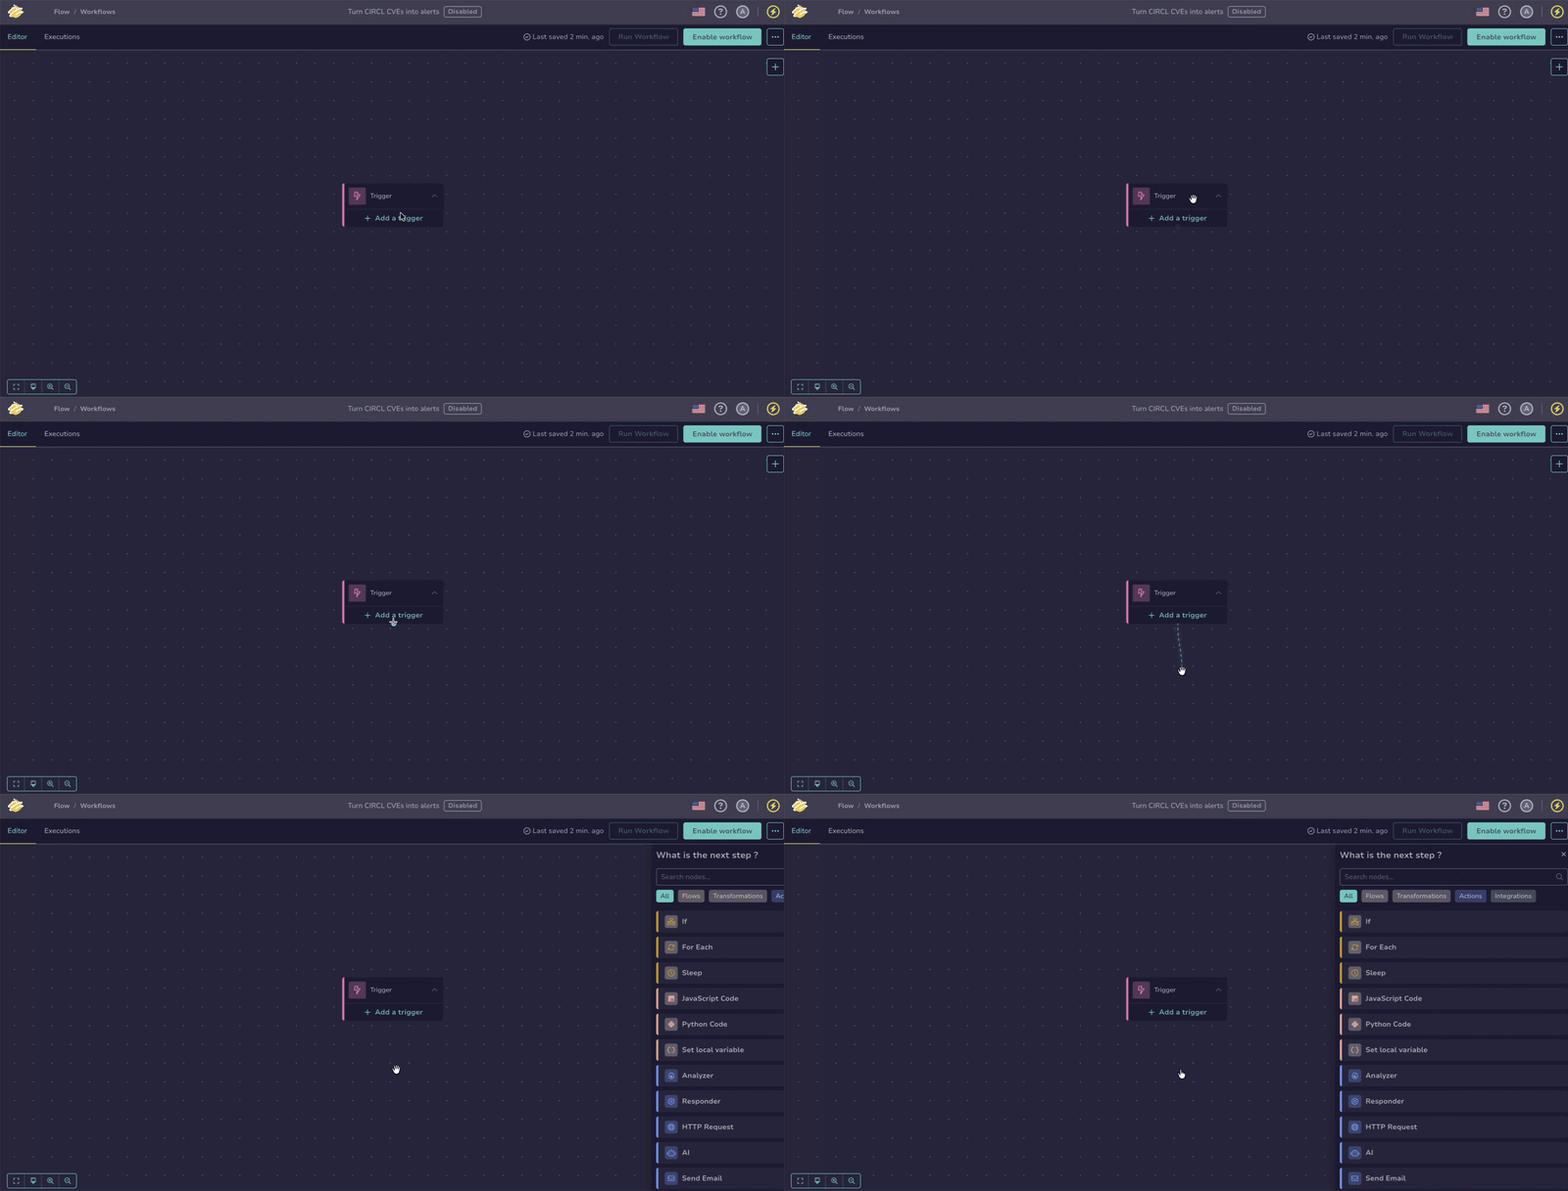
-
In the What is the next step? drawer, select Set local variable.
-
Select in the Variables section.
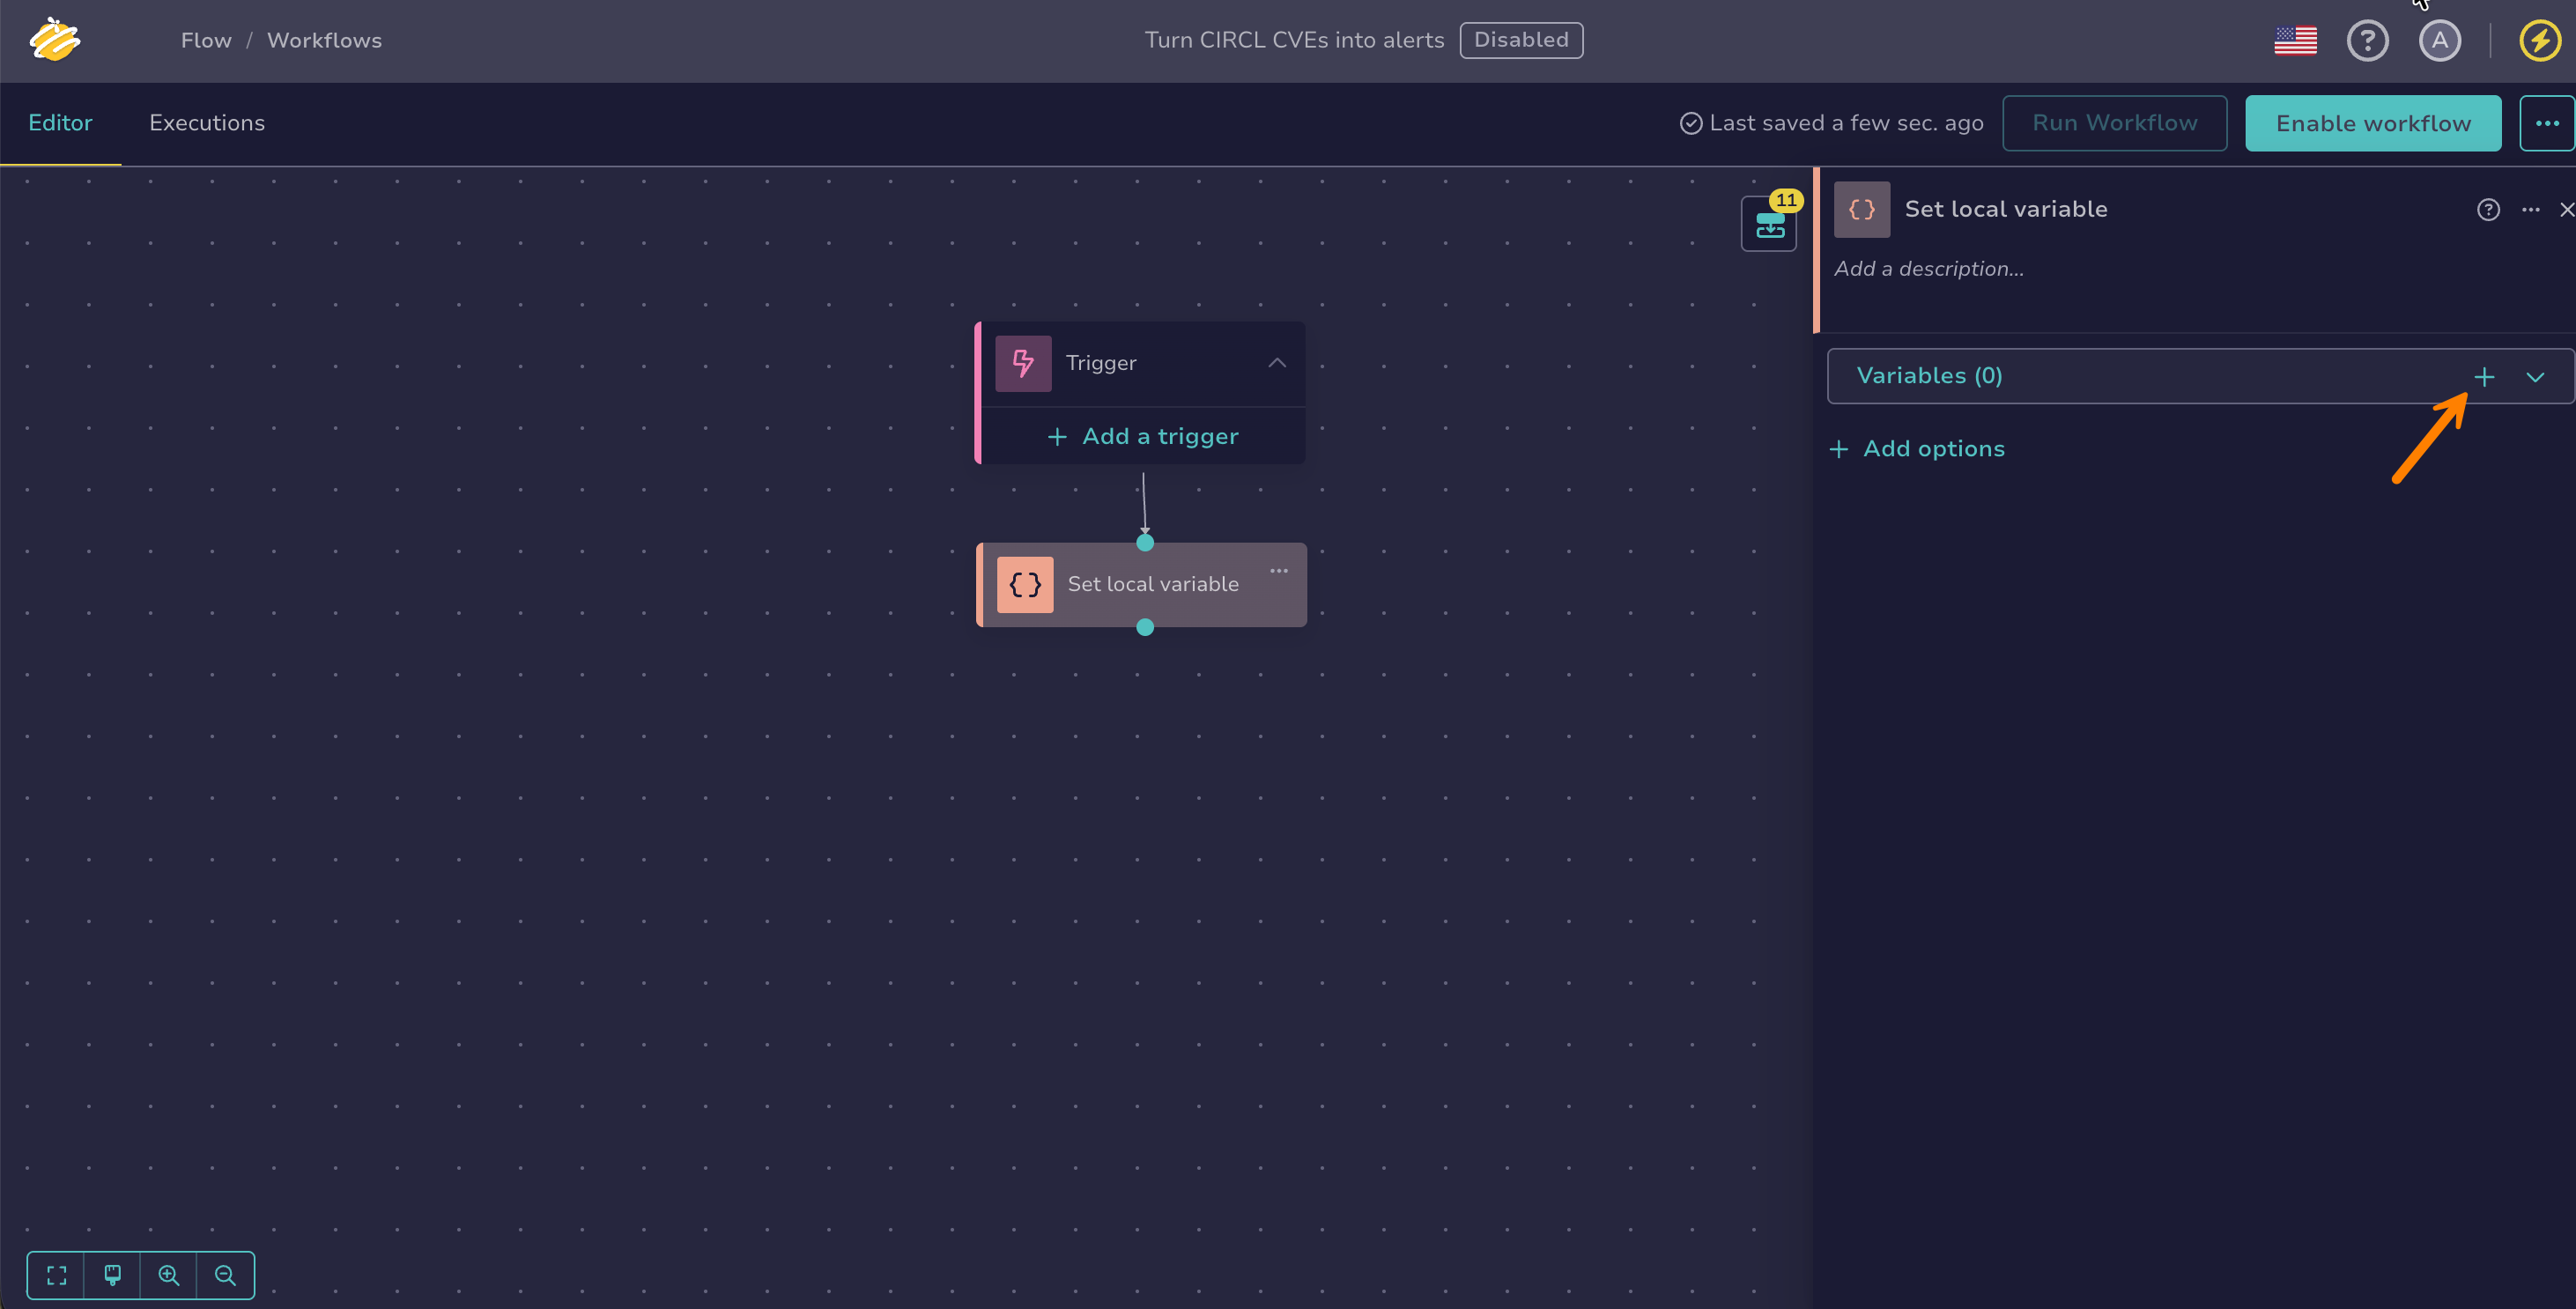
-
In the Set local variable drawer, enter the following information:
- Name:
vendor- Type:
string- Value:
appleThen, still in the drawer, select to add a second variable.
- Name:
product- Type:
string- Value:
macos -
Select the node title and rename it to
Set vendor and product.Renaming nodes is optional but recommended. Descriptive names make your workflow easier to read at a glance. You can also add a description to a node, but it appears only in the node configuration drawer, not on the canvas.
-
To exit the node configuration, select an empty space in the workflow editor or select .
The workflow configuration is automatically saved at each step.
You now have two local variables that scope the CIRCL API query to a specific vendor and product.
Step 3: Fetch the latest CVEs#
Add an HTTP request node to fetch the latest CVEs for the vendor and product you set in the previous step.
-
Add an HTTP request node by dragging the
Set vendor and productnode's connector to an empty area of the canvas and selecting HTTP request in the What is the next step? drawer. -
In the HTTP request drawer, enter the following information:
- Method:
GET- URL:
https://cve.circl.lu/api/search/Position the cursor at the end of the URL, select the $var button, then select Set vendor and product > vendor.
Enter
/and select the $var button again to select Set vendor and product > product.Inserting variables
Instead of the $var button, you can enter
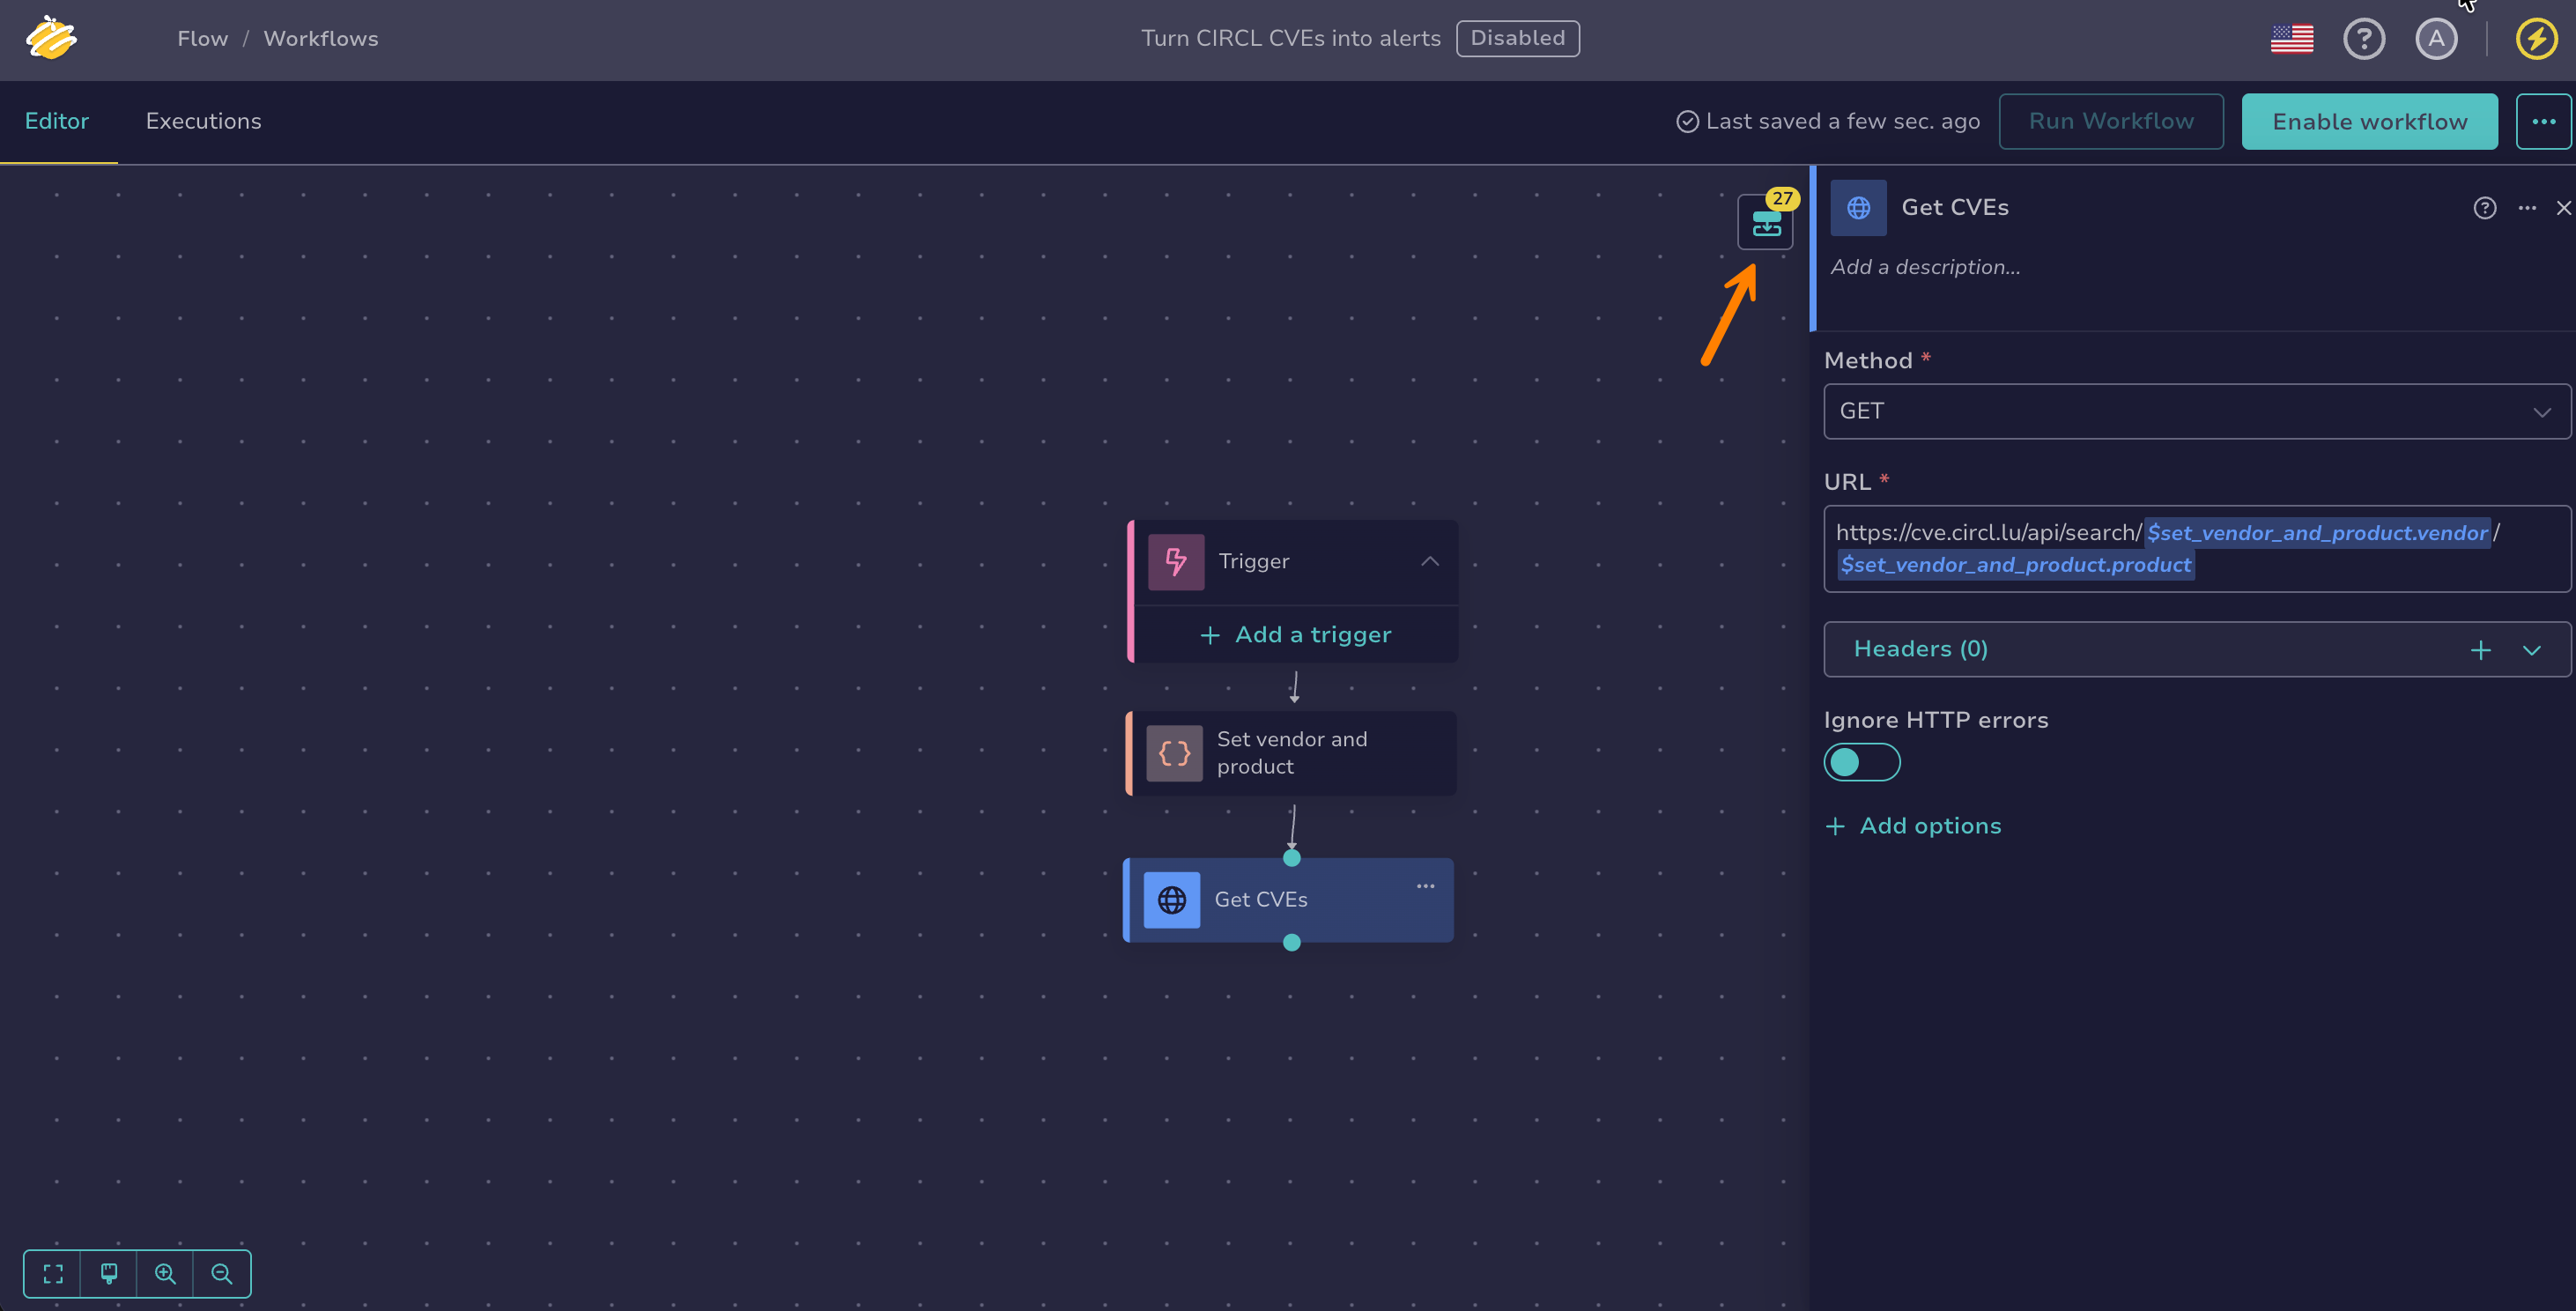
$in the field, then the first characters of the variable name to filter the suggestions. Then select one of the suggestions to insert the reference. You can't enter the full reference manually.The final URL should look like this:
https://cve.circl.lu/api/search/$set_vendor_and_product.vendor/$set_vendor_and_product.product -
Rename the node to
Get CVEs. -
Select to view the available outputs.
Output Type Description bodyobject The response body returned by the server. Not set for a multipart response: use partsinstead.codenumber The HTTP status code returned by the server. headersobject The response headers returned by the server. partsobject The parts of a multipart response body, keyed by part name. Each part carries its filename,content_type,size, andcontent. Empty when the response isn't multipart.These outputs are JSON values, automatically available as output variables in subsequent nodes. Because the workflow hasn't run yet, hovering over an output shows an example value. After the workflow has run, it shows the result from the last execution.
The HTTP request is now configured to fetch CVE data from CIRCL for Apple macOS. Before continuing, test what you've built so far.
Step 4: Test the CVE retrieval#
Testing as you build is a good habit in TheHive Flow. It helps you catch errors early and know exactly where they occurred. Execution logs are also available to help you understand why a workflow isn't working as expected. You'll use them in the final step of this exercise.
-
To test a workflow, you need to enable it first. In the workflow editor, select Enable workflow.
-
Select Run workflow.
-
Select the
Get CVEsnode and then select . -
Hover over the
bodyoutput to check that the node received data.Hovering over the output lets you inspect the data and its structure, which helps when you reference specific fields of the corresponding output variable in the next step.
If you see a list of CVE objects, your request is working correctly. You've fetched and stored the latest CVEs from CIRCL.
Step 5: Extract the CVE list#
Next, create another local variable to store the CVE list from the body response. You could reference the body output variable of the Get CVEs HTTP request node directly. Assigning it to a named local variable makes the intent explicit and the workflow easier to follow.
-
Add a Set local variable node from the
Get CVEsnode. -
In the Set local variable drawer, select in the Variables section, then enter the following information:
- Name:
CVEList- Type:
array- Value: Select the + button, enter
$, select the Get CVEs > body variable, and add.results.nvdwhile still inside the jq expression.Select the suggestion from the Step variables group, not from the Files group. Entries in the Files group expose file metadata such as the file name and size, not the value itself, and resolve to nothing when the value isn't stored as a file.
Add
.results.nvdinside the inserted reference, not after it: select the reference to edit inside it. Text entered after the reference isn't part of the jq expression and makes the node fail at execution.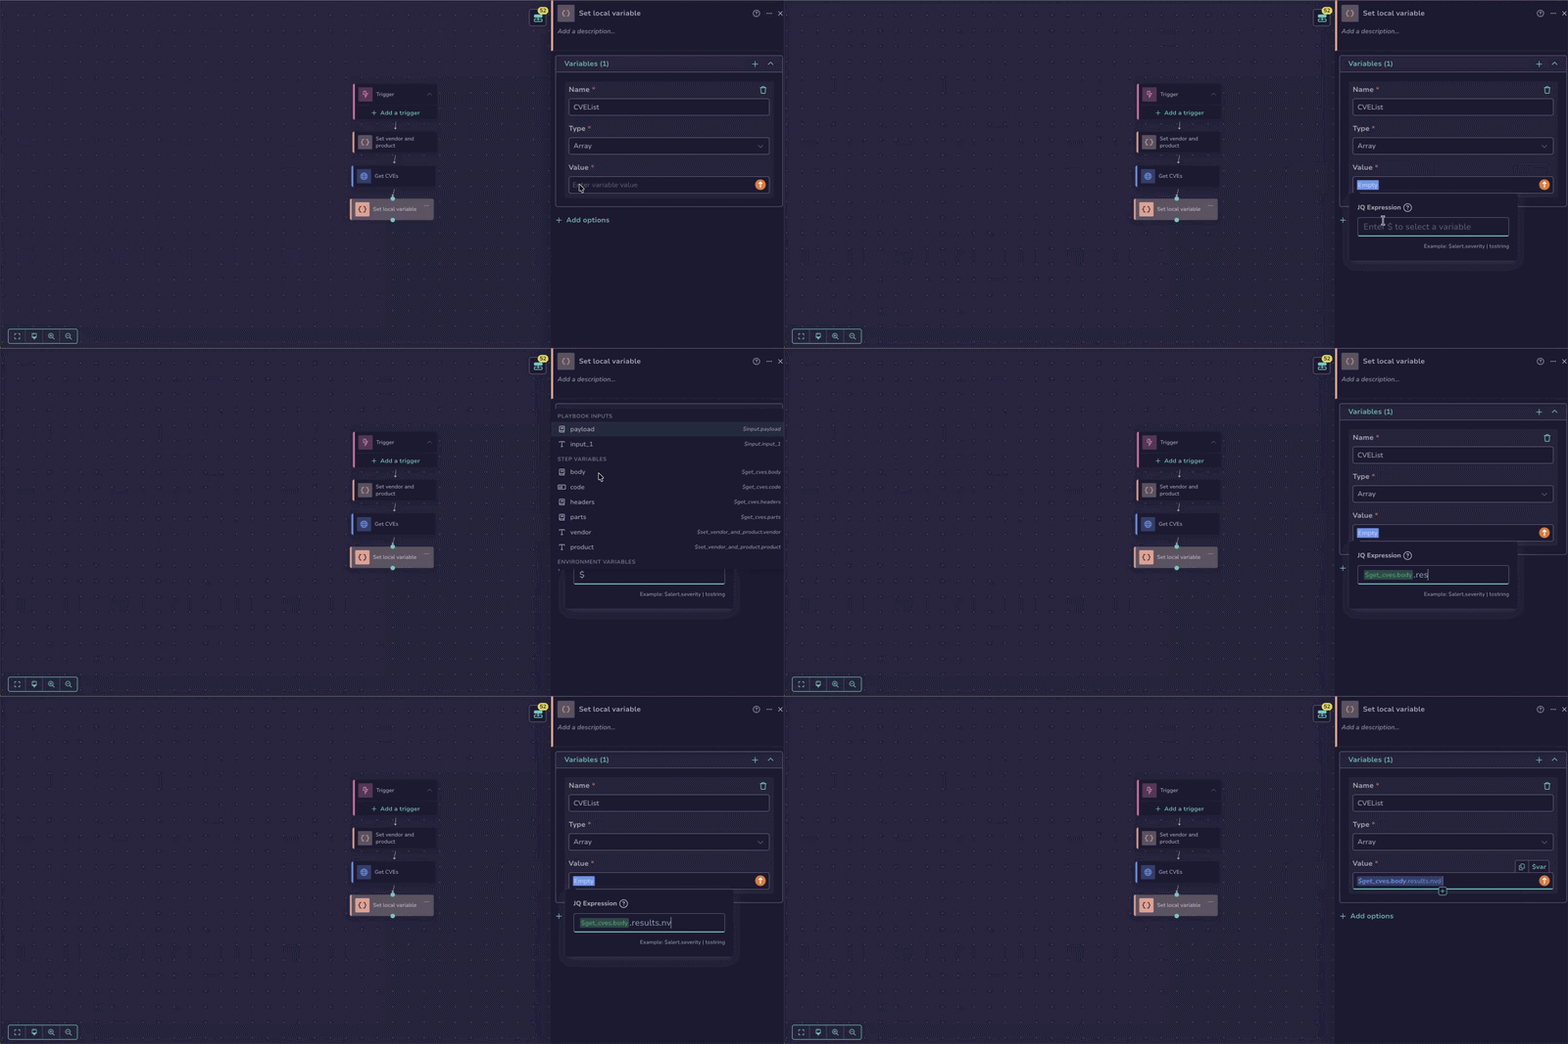
You can also insert the variable with the $var button, then select the inserted reference to add a field.
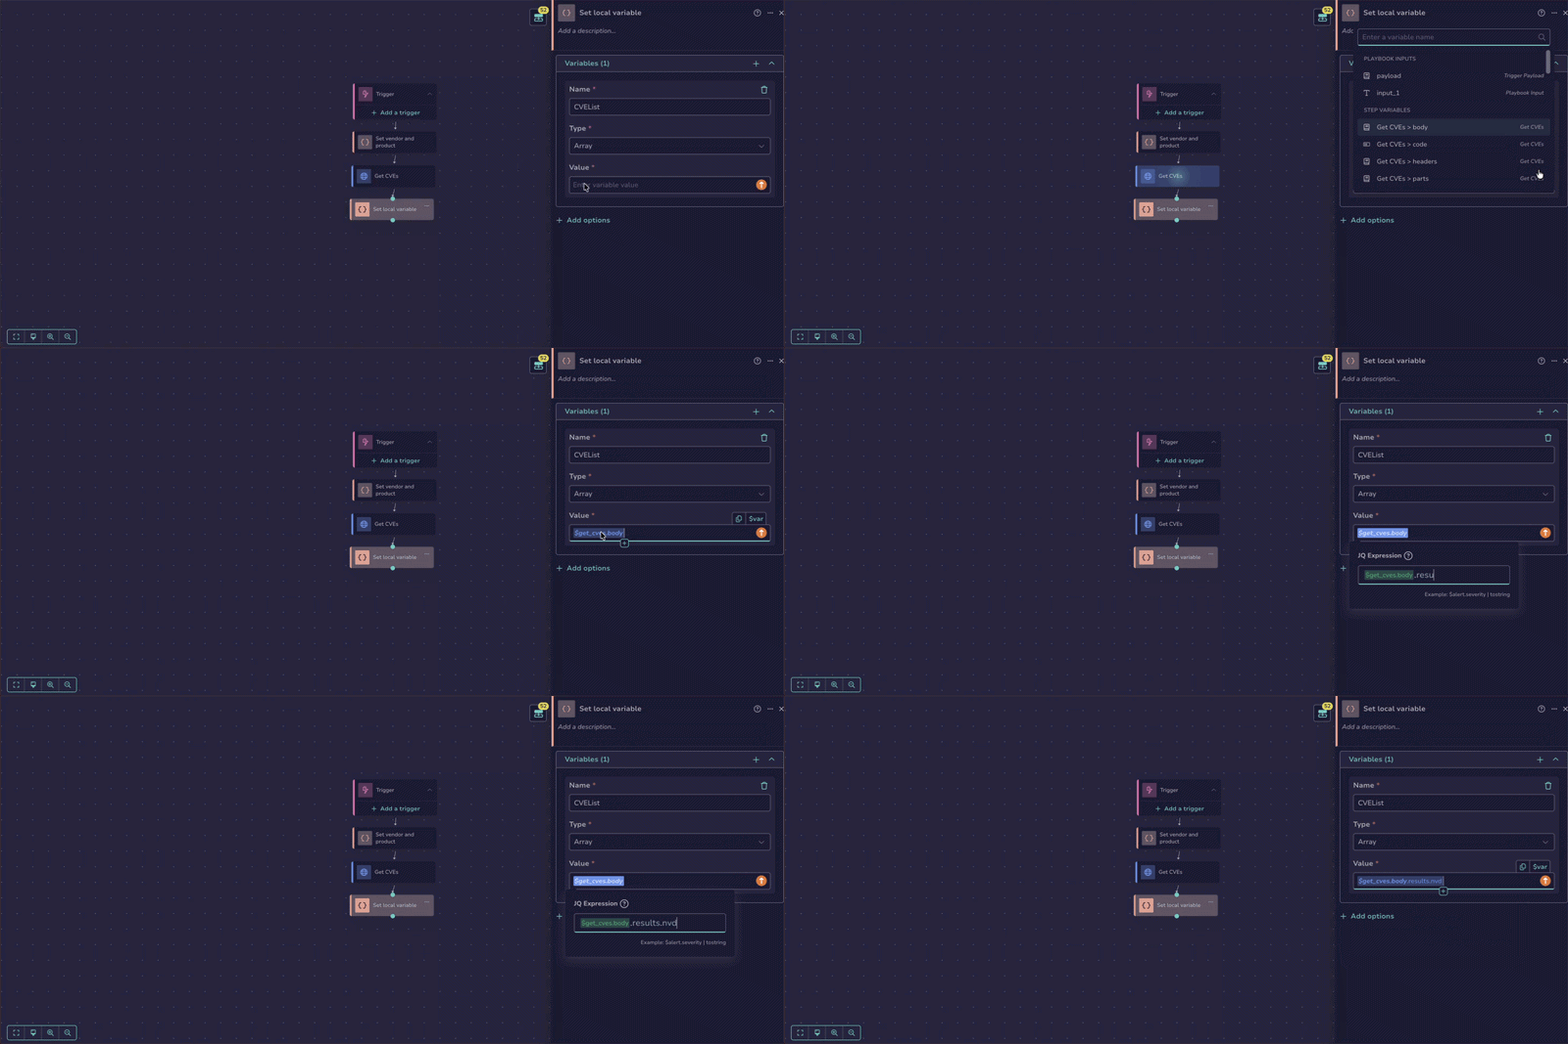
Add fields inside the reference
For blue references, which are jq expressions, always add fields by editing the inserted reference, as described above. Text entered directly after a blue reference in the field value is treated as literal text, not as part of the jq expression, and the node fails at execution with a type mismatch.
Case-sensitive field names
Field names within variables are case-sensitive. Use the exact casing, or the expression won't work.
The final value should look like this:
$get_cves.body.results.nvd. -
Rename the node to
CVE List.
You've now set up the data pipeline: the workflow fetches CVEs from CIRCL and stores them as a local array variable.
Step 6: Process each CVE and filter by record type#
Now loop over the CVE array and filter out entries that aren't valid CVE records before creating alerts in TheHive.
-
Add a For each node from the
CVE Listnode. -
In the For each drawer, select the CVE List > CVEList variable in the Field to iterate over field.
Iterations run sequentially by default. For this exercise, leave them sequential and keep the Parallel execution toggle turned off.
The Loop output variables section aggregates values produced inside the loop across all iterations, so nodes placed after the loop can use them. This exercise creates the alerts inside the loop itself and doesn't need them.
-
Add a Set local variable node from the
For eachnode.The For each node has two branches: the
Loopbranch and theDonebranch. Use theLoopbranch: . -
In the Set local variable drawer, select in the Variables section, then enter the following information:
- Name:
CVE- Type:
json- Value: Select the + button, enter
$, select the For each > item variable, and add[1]while still inside the jq expression.The final value should look like this:
$for_each.item[1].In a For each node,
itemis the current iteration value andidxis its key. Here, CIRCL returns each entry as a two-element[id, CVE]pair, soitem[0]is the CVE ID anditem[1]is the CVE object you need. -
Rename the node to
Set CVE occurrence. -
Add an If node from the
Set CVE occurrencenode. -
In the If drawer, select the Set CVE occurrence > CVE variable, then enter
.dataType == "CVE_RECORD"directly after it.In an If node condition, the inserted reference is green because it's a direct variable. Unlike with blue references, text entered after a green reference isn't literal: it extends the expression. Entering text directly after it is correct here.
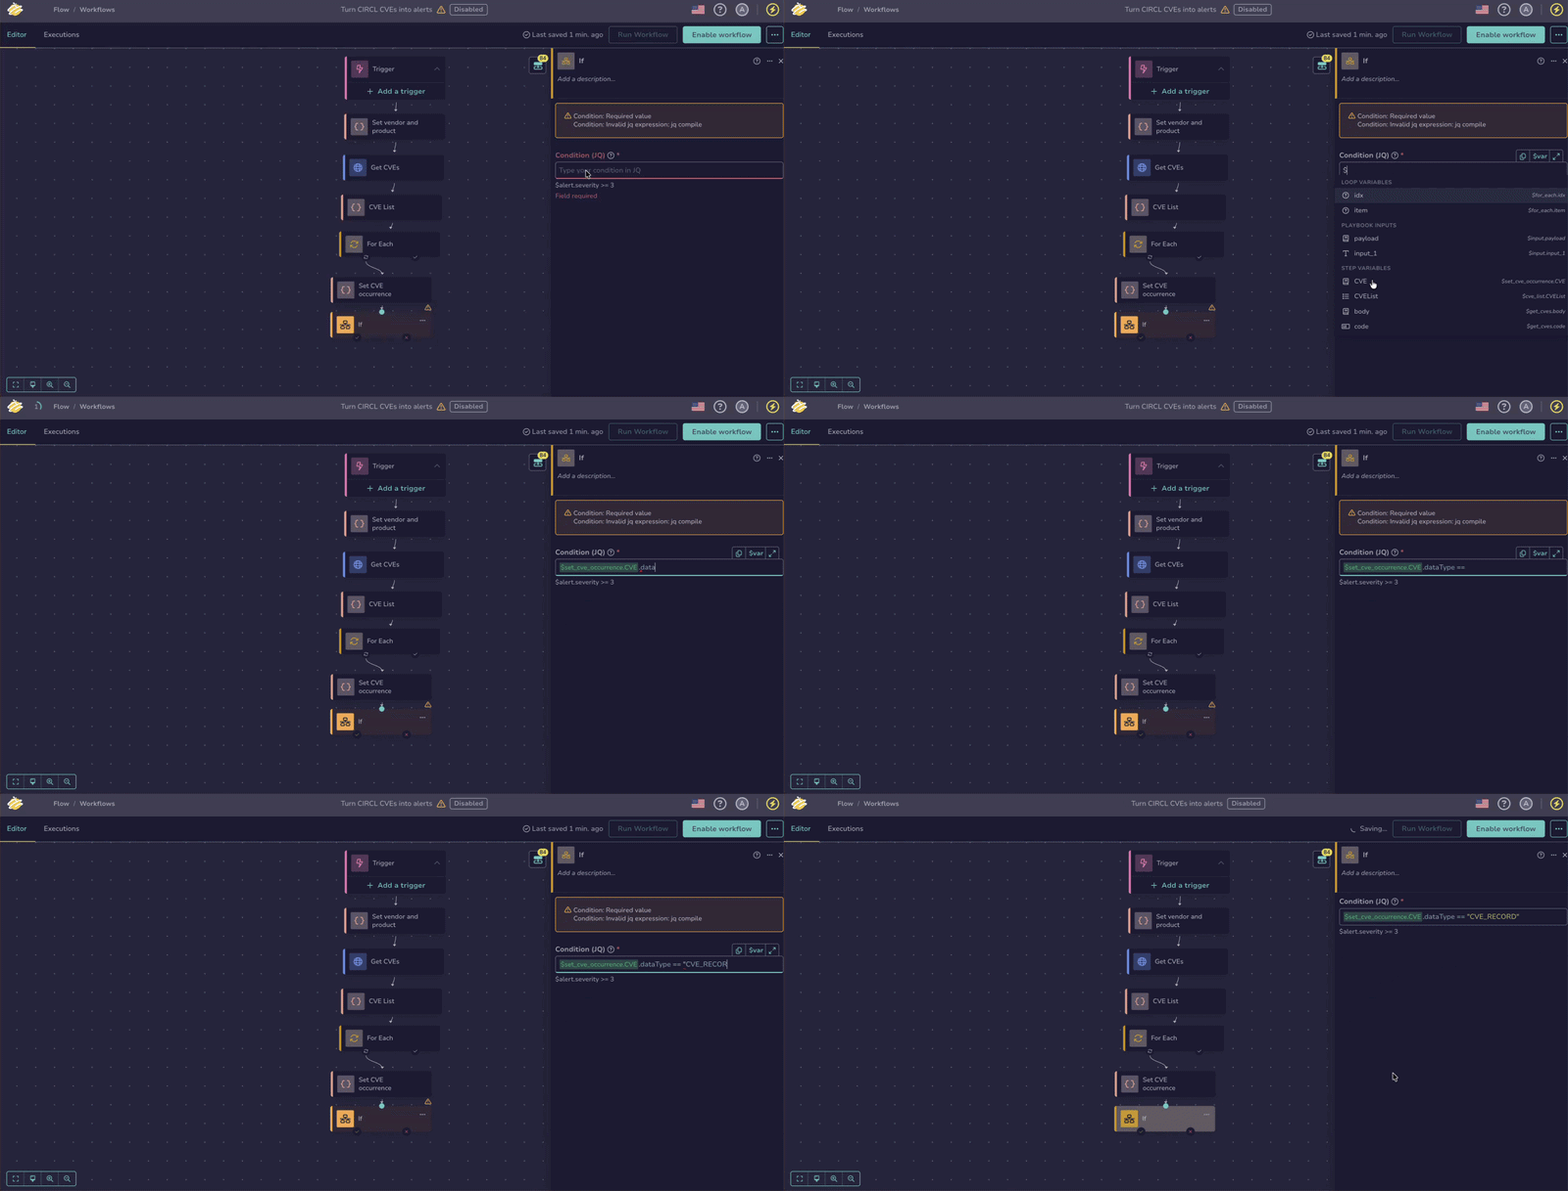
The final value should look like this:
$set_cve_occurrence.CVE.dataType == "CVE_RECORD".
You've set up the loop and filter logic for the workflow. Only CVEs with a dataType of CVE_RECORD move forward to the next step, where they're created as alerts in TheHive.
Step 7: Create alerts in TheHive#
To complete the workflow, you'll store your TheHive API key as a global variable, prepare the alert content from the CVE data, and create the alert in TheHive with a TheHive node.
Have your TheHive API key ready
To find it, see Manage User Accounts.
-
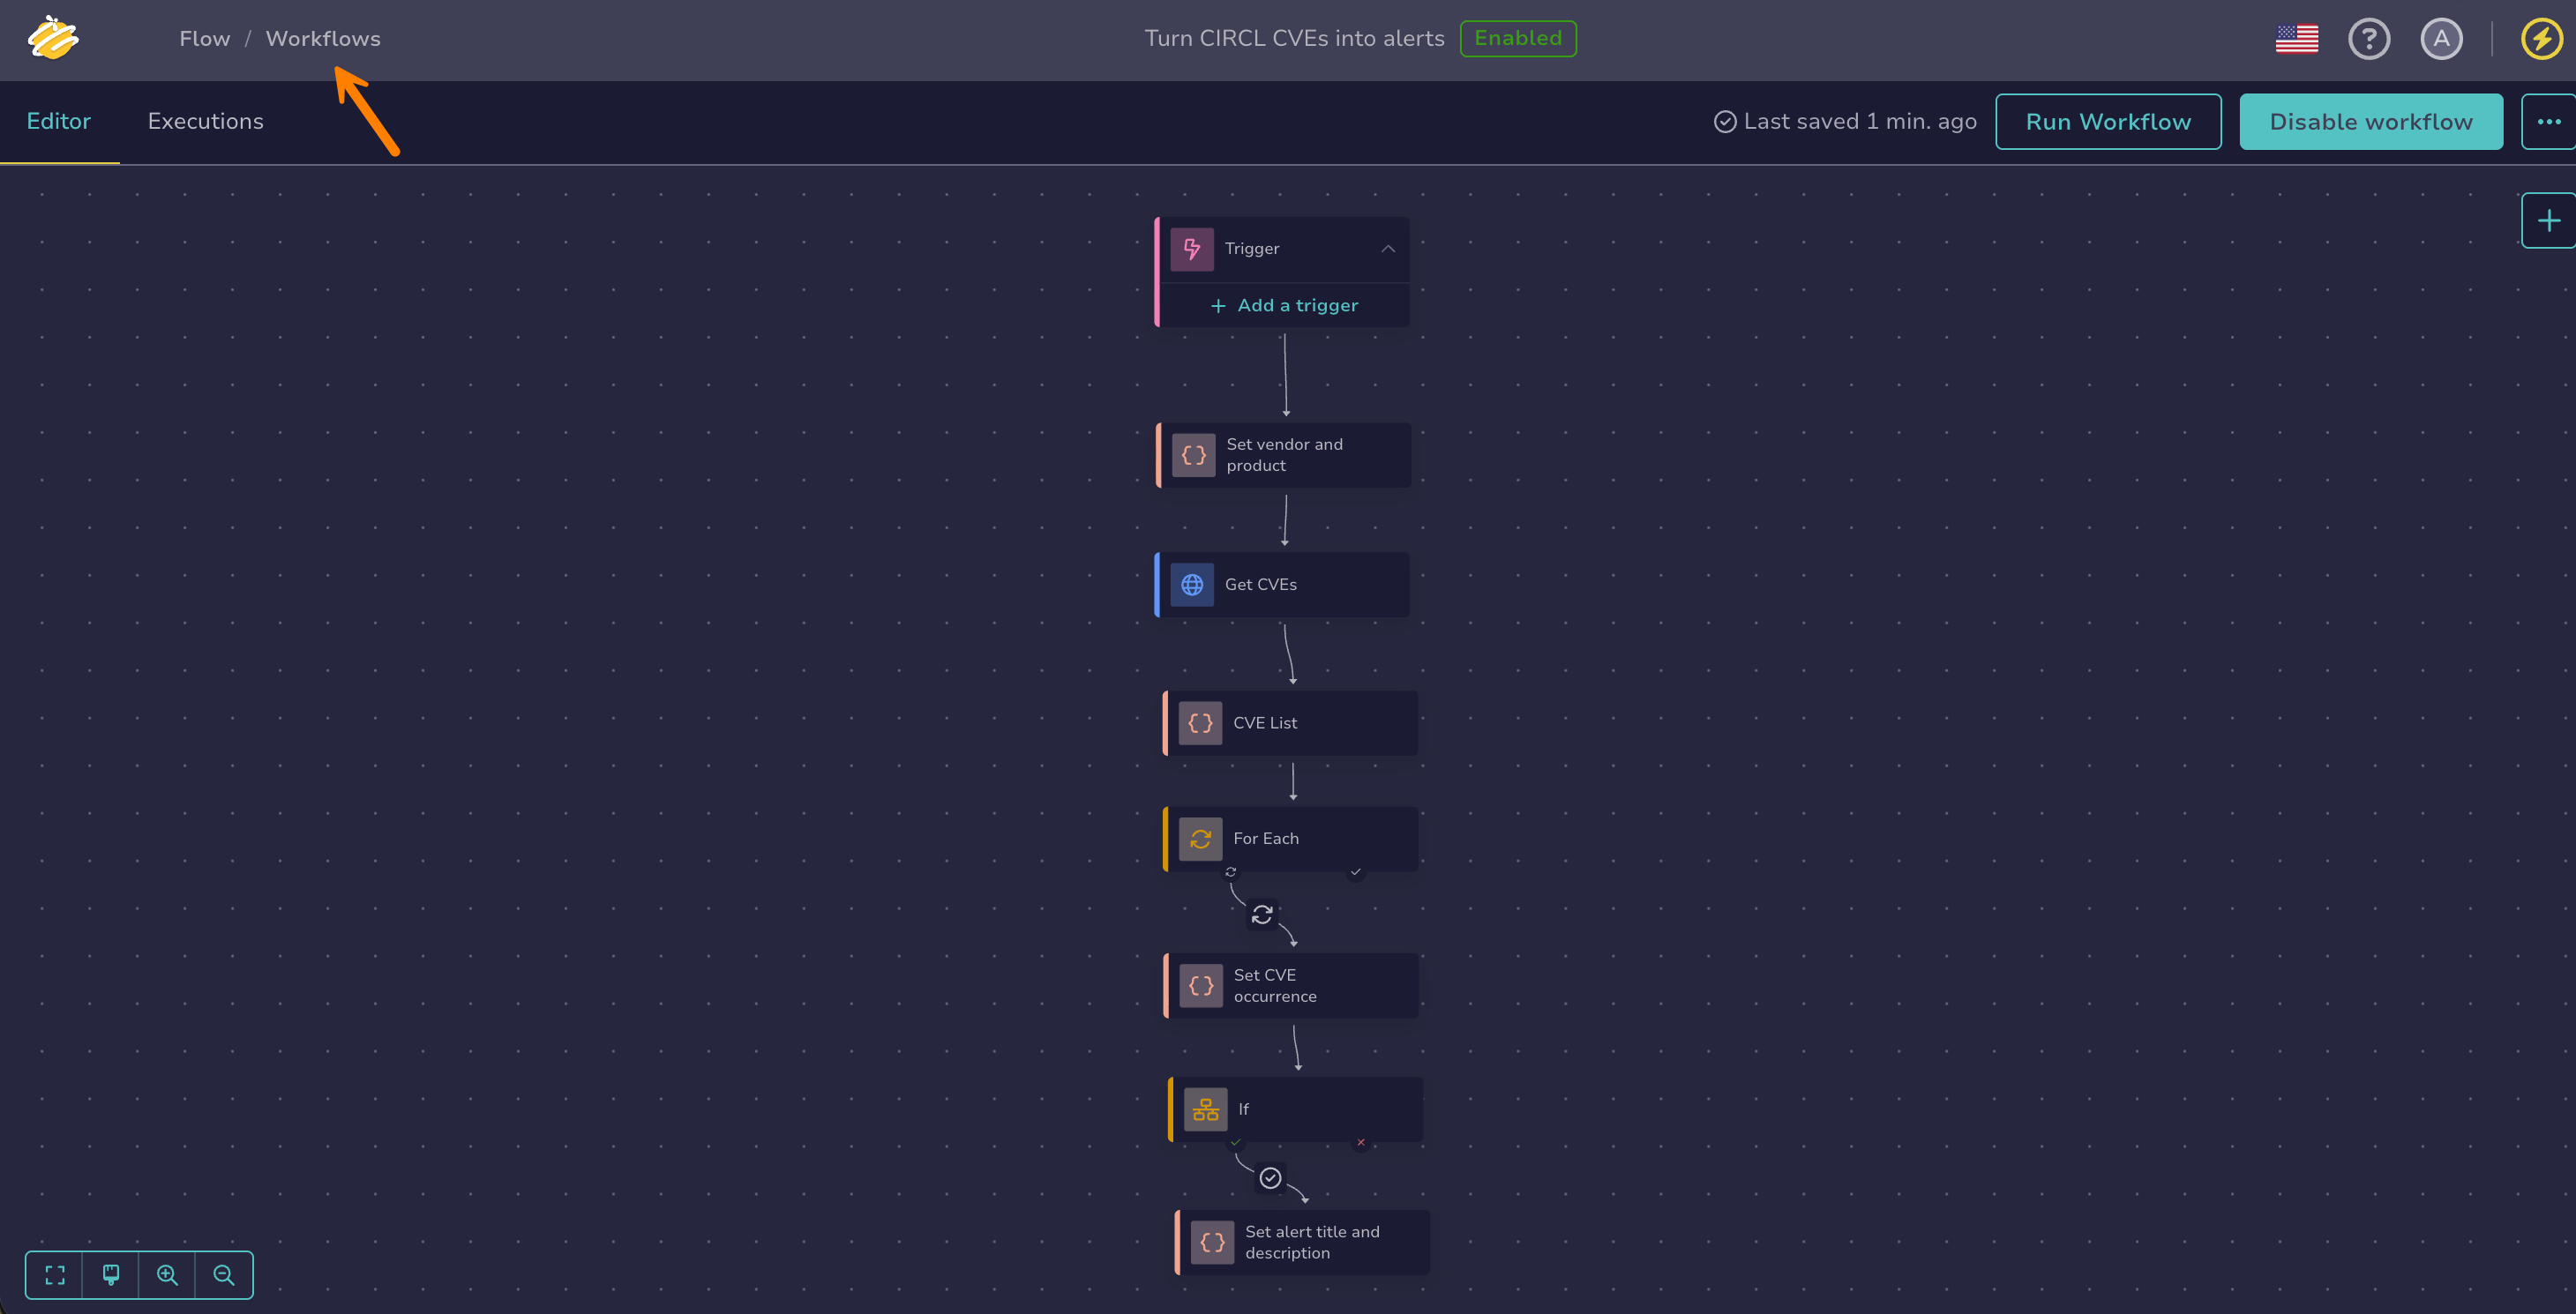
From the workflow editor, select Workflows to go back to the workflow list.
-
Select the Global variables tab.
You manage global variables from this tab. Unlike local variables, global variables are defined once and shared across all workflows. They can be visible or secret.
-
Select .
-
In the Create a variable drawer, enter the following information:
- Name:
api_key_thehive- Secret:
On- Value:
stringand paste your TheHive API key. -
Select Save.
-
Select the Workflows tab and select your
Turn CIRCL CVEs into alertsworkflow. -
Add a Set local variable node from the
Ifnode.The If node has two branches:
trueandfalse. Use thetruebranch: . -
In the Set local variable drawer, select in the Variables section, then enter the following information:
- Name:
alertTitle- Type:
string- Value: Enter
New CVE:, then select the + button, enter$, select Set CVE occurrence > CVE, and add.cveMetadata.cveIdwhile still inside the jq expression.The final value should look like this:
New CVE: $set_cve_occurrence.CVE.cveMetadata.cveIdThen, still in the drawer, select to add a second variable.
- Name:
alertDescription- Type:
string- Value: Select the + button, enter
$, select Set CVE occurrence > CVE, and add.containers.cna.descriptions[0].valuewhile still inside the jq expression.The final value should look like this:
$set_cve_occurrence.CVE.containers.cna.descriptions[0].value -
Rename the node to
Set alert title and description. -
Add a TheHive node from the
Set alert title and descriptionnode. -
In the TheHive drawer, enter the following information:
- Base URL:
https://<thehive_host>Replace
<thehive_host>with the host name or IP address of your TheHive instance.- Bearer token: In the Authentication section, select the
api_key_thehiveglobal variable.- Organization: Enter the name of the organization where the alert is created. If left empty, the node uses the default organization of the account that owns the API key.
- Action: Select Create Alert.
Then fill in the fields for the action:
- Type:
CVE- Source:
flow- Source ref: Select the + button, enter
$, select Set CVE occurrence > CVE, and add.cveMetadata.cveIdwhile still inside the jq expression.- Title: Select the $var button and select Set alert title and description > alertTitle.
- Description: Select the $var button and select Set alert title and description > alertDescription.
The Create Alert action offers more fields, but these are all you need for this exercise.
-
Rename the node to
Create alert.
Your workflow is now complete. The workflow sends each CVE that passes the CVE_RECORD filter to TheHive as a new alert, with a structured title and description taken from the CVE data.
Step 8: Run the workflow#
With the workflow fully built, run it and verify that it creates alerts in TheHive.
After Step 4, your workflow should still be enabled. If you turned it off, re-enable it before continuing.
-
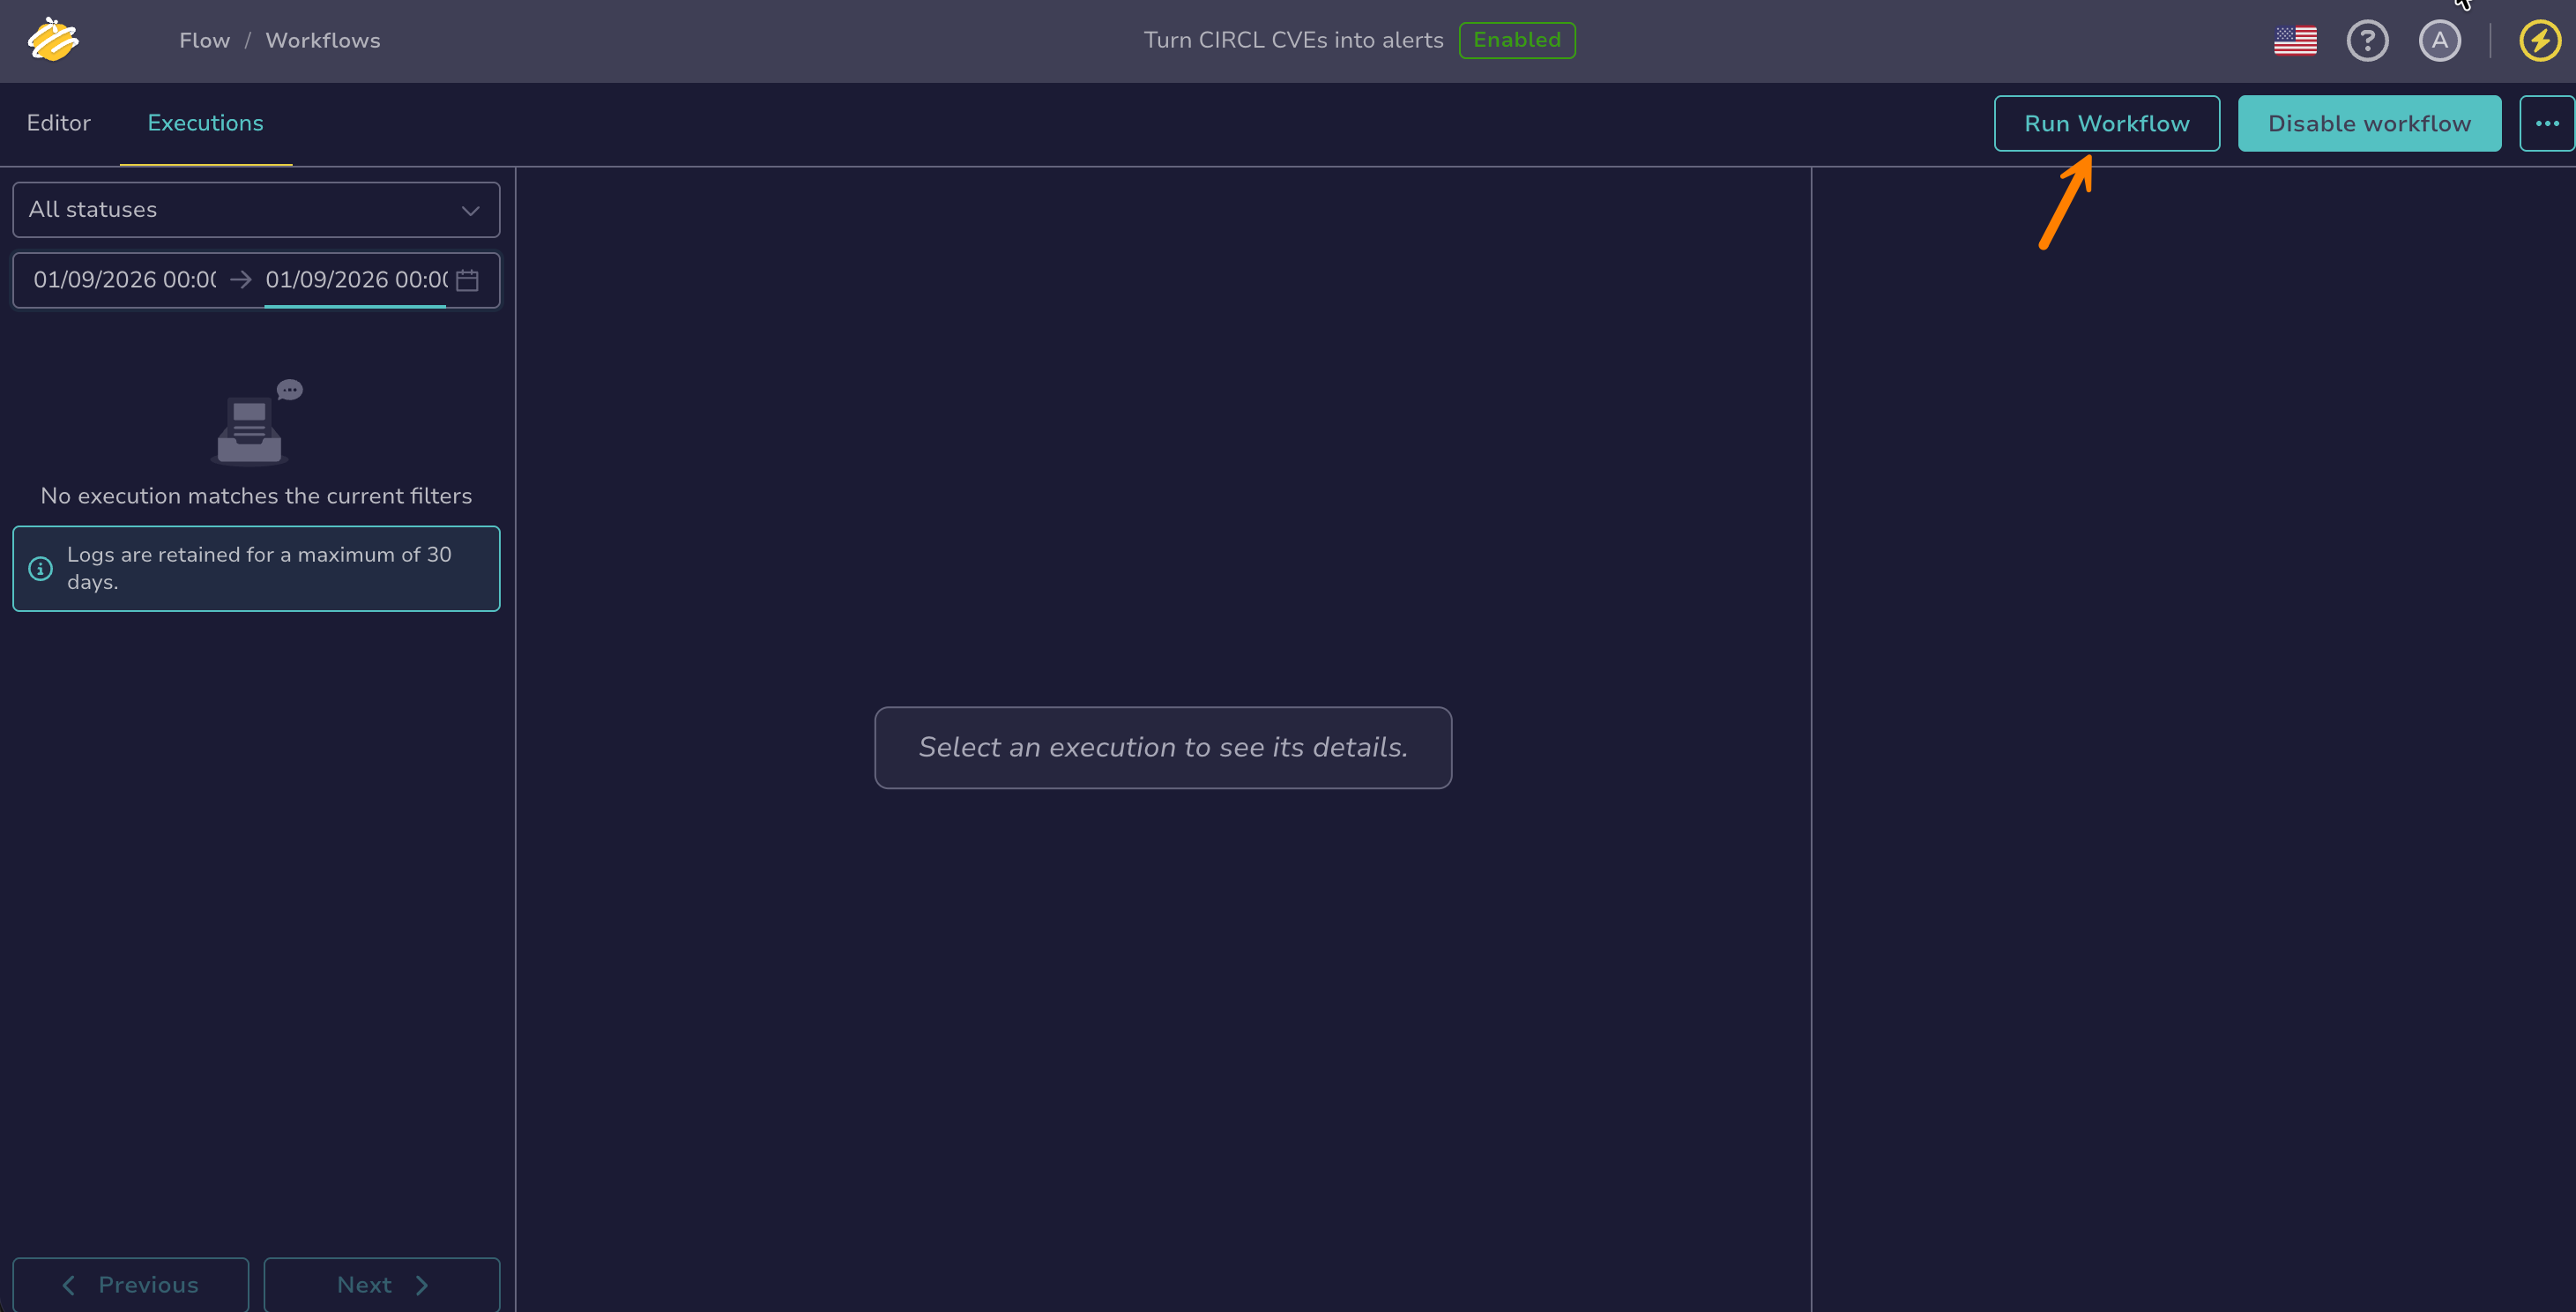
Go to the Executions tab and select Run workflow.
-
Follow the execution of each node in real time.
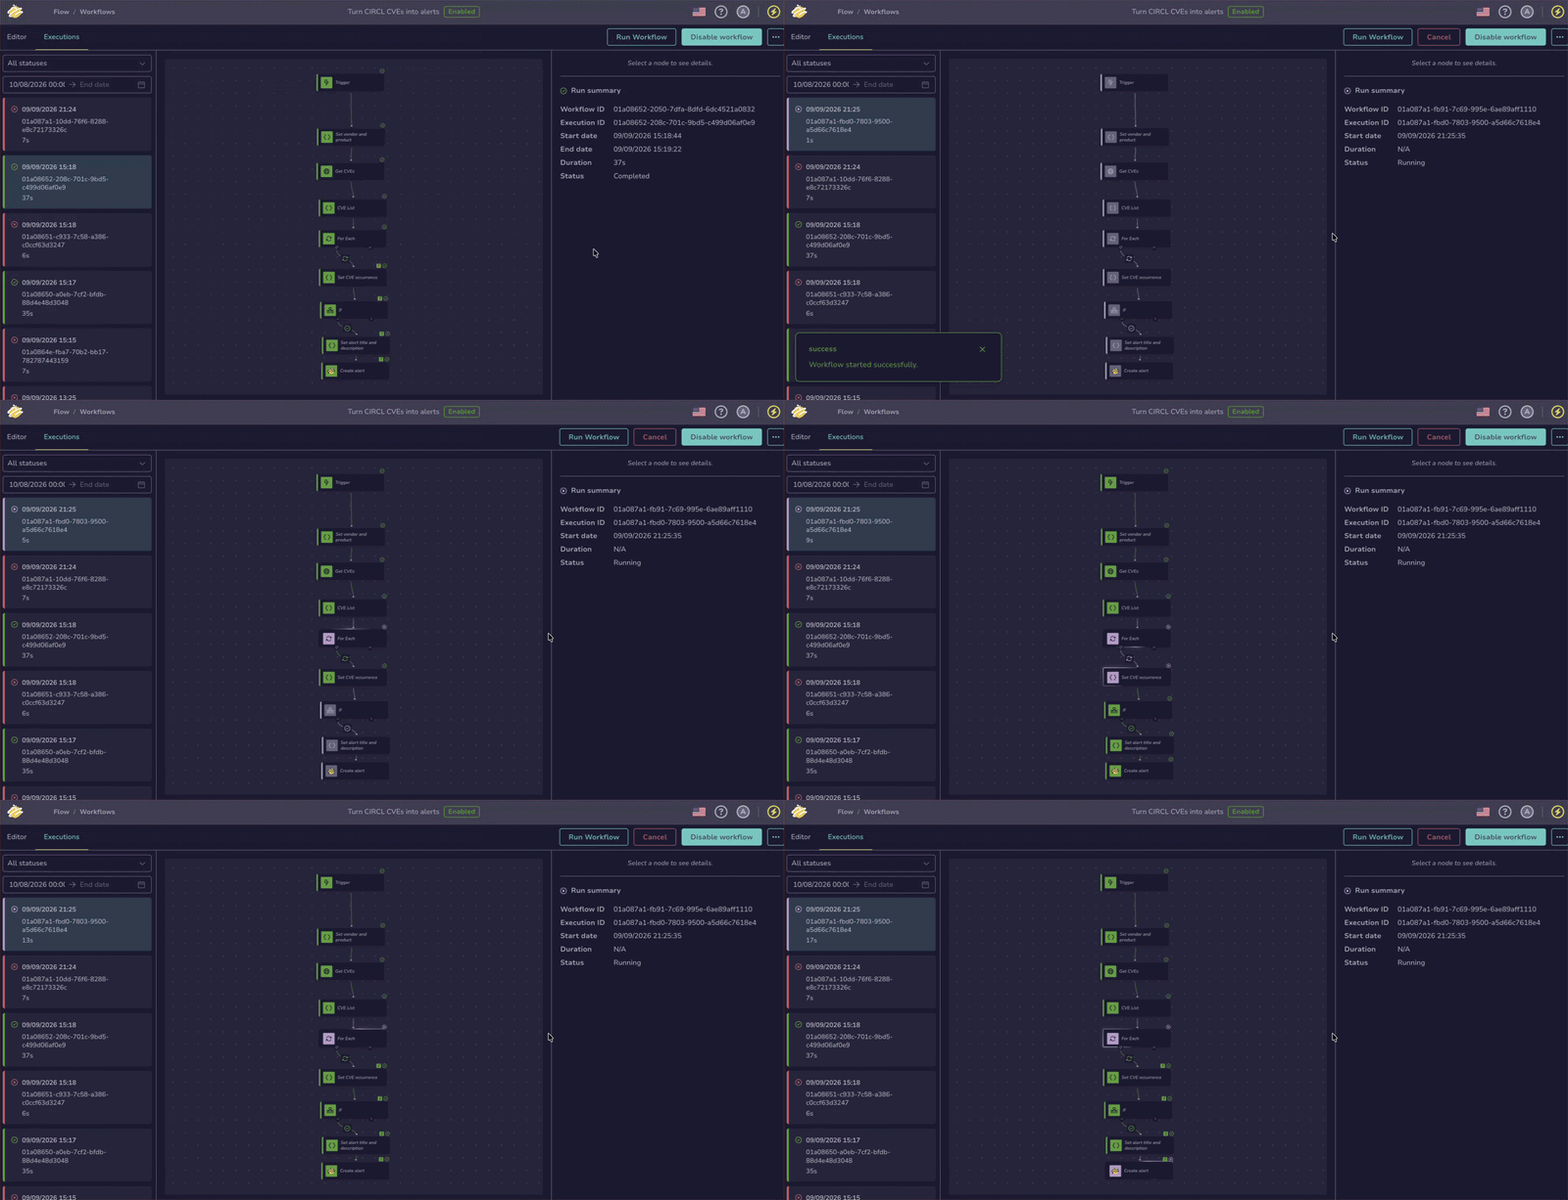
Nodes turn purple while running, green on success, red on failure, and stay gray if they aren't reached because of an upstream interruption. Select a red node to read the error message and fix the issue.
The trigger node shows Manual because you started the run yourself. Select it to inspect the trigger payload the run received, displayed in Input.
Nodes that run more than once inside the loop display a badge with the number of iterations. When some iterations succeed and others fail, two badges appear: one counts the successful iterations and the other the failed ones. A loop node turns red as soon as one iteration fails, even if the others succeeded.
-
After the execution completes, go to the Alerts view and look for new alerts with the type
CVEand the sourceflow.
If alerts appear in TheHive, your workflow is working end to end. You've built your first workflow in TheHive Flow!
Running the workflow more than once
TheHive rejects an alert when one with the same type, source, and source reference already exists in the organization. If you run the workflow again, the Create alert node fails with a 400 error for each CVE already imported. To run the exercise again, delete the previously created alerts in TheHive first.
Run a workflow on a case or an alert
You can also run a workflow from a case or alert page in TheHive. The run passes the case or alert identifier to the workflow in the trigger payload, and to the case_id or alert_id input variable when the workflow declares it. A workflow can then act on the entity it was launched from, for example to enrich a case or triage an alert.
(Optional) Step 9: Clean up#
This exercise creates real alerts in TheHive. Delete the alerts you no longer need and turn off the workflow. Deleting the alerts also lets you run the exercise again: TheHive rejects a new alert matching an existing one, whatever its status.
-
In the Alerts view, filter on the source
flowto isolate the alerts created by the workflow. -
Select in the column header to select all the alerts on the page, then select above the list.
-
In the confirmation dialog, select OK.
-
Go back to the Flow view, select the workflow, then select Disable workflow.
No trigger is configured, so the workflow runs only when started manually. Turning it off prevents an accidental run from creating new alerts.